

Yup, you read that right. We renovated a kitchen in FIVE days. Less than a week. New cabinets, new appliances, new countertops, we did it all. IN. FIVE. DAYS. Okay, sorry for the all-caps yelling, but this project was near and dear to our hearts and we almost couldn’t believe it ourselves that we managed to finish it in five days.
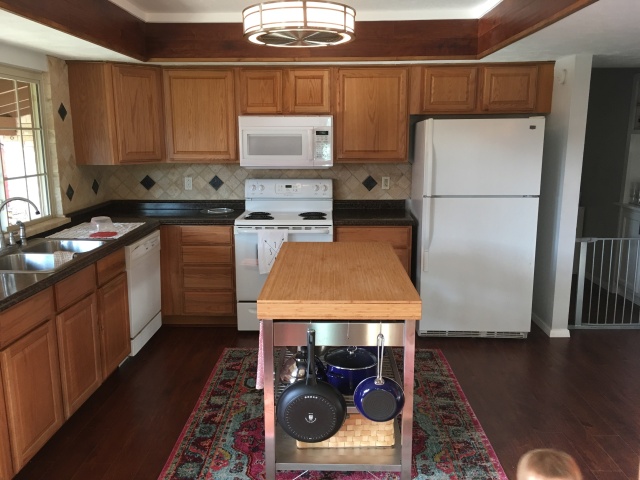
But let’s start at the beginning. Andrew’s cousin, Claire, (my cousin-in-law, if you will) bought her first house in the suburbs of Dallas in March of 2018 and although it had hardwood floors and fresh paint, the kitchen was lacking. There were oak cabinets, old white appliances and formica countertops. None of it was her style, nor was it aesthetically pleasing to most. Nonetheless, she moved in and lived with it for a few months, then we got the call where she enlisted our help.
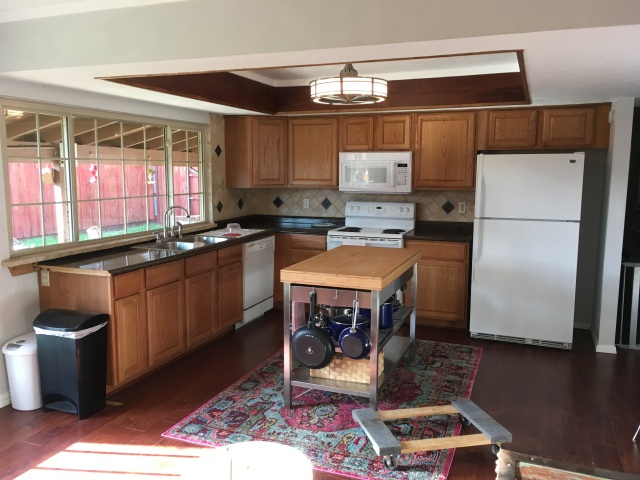
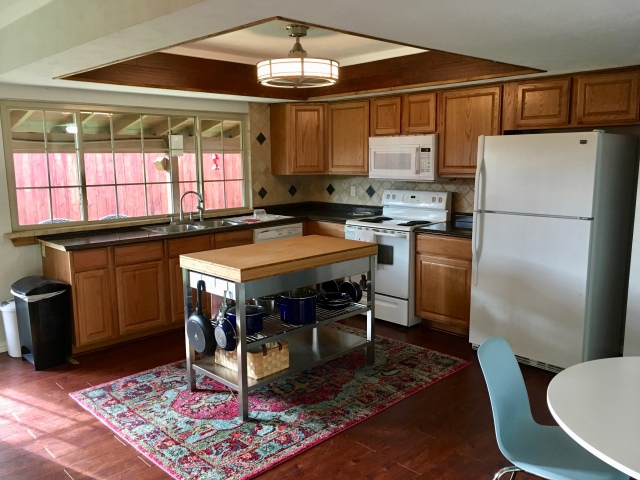
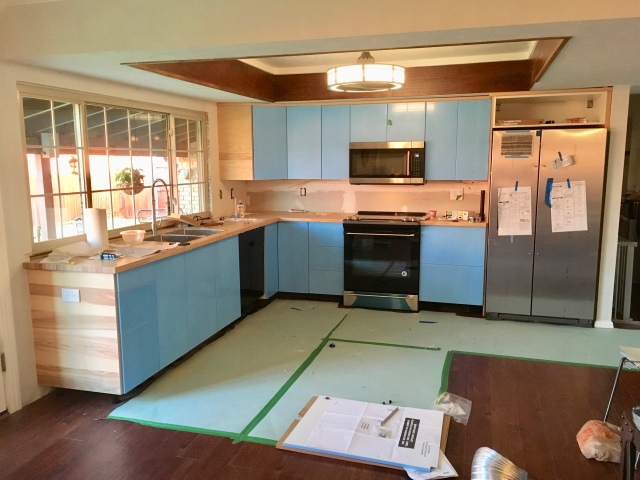
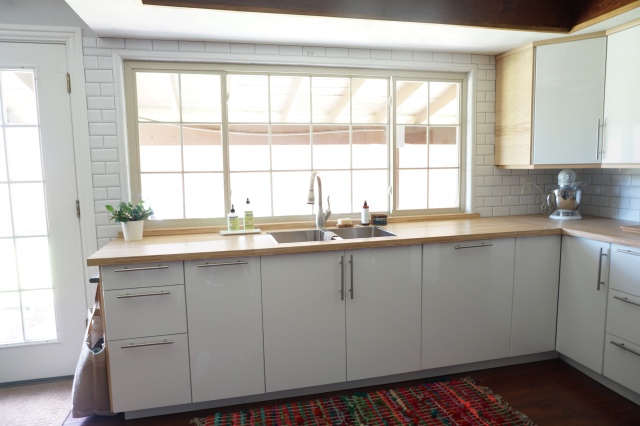
The island is not original to the house, Claire added that after moving in, keeping in mind the ideas she had for changing the kitchen. The layout works well for this kitchen, but there were a few things begging for an update. The kitchen sink was not centered on the gigantic window overlooking her backyard and patio (who does that anyways?), and there was a dead space next to the refrigerator just collecting dust. A lack of under-cabinet lighting made food prep less than desirable and the whole kitchen just looked a little dull.
So, when Claire decided it was time for an update, she headed to IKEA, armed with her measurements and a few ideas of what she wanted her new kitchen to look like. If you don’t have any experience with the IKEA kitchen department, they are super helpful – they will create a schematic of your space and will help you layout every last inch of your kitchen to get the most functionality from your space. When they do this, they also create an all-inclusive list of everything you need to put your new kitchen together so that you don’t forget even one tiny screw. Claire ordered all of the necessary parts for her new kitchen, during IKEA’s bi-annual kitchen extravaganza sale (okay I may have made up that name but the sale is real) and gathered all of the materials in her garage.
Here’s where Andrew and I (and a few other family members) entered the equation; for the install. Now, again, if you aren’t familiar with IKEA kitchens, let me inform you that, everything must be built before you can install it. The cabinets and drawers come in flat packages and everything must be assembled by you. This is unlike custom cabinets (or cabinets off the shelf at home improvement stores) which come as already constructed cabinet boxes and drawers. Claire started some of this prep work before our arrival, then the remaining pieces were assembled during the renovation period.
We call this our ‘5-day kitchen reno’ and while the work was completed in 5 days, those days were not consecutive (although they could have been had our schedule allowed). We split the work into 2 consecutive weekends (my husband has a full-time job working in commercial construction, so this was the available time we had) and the last day was reserved for the tile guy and miscellaneous odds and ends. Claire was able to live off cereal and popcorn (kidding) for the 5 days in between the two weekends her kitchen was torn apart. We actually moved the refrigerator you see pictured above into her garage permanently (all other appliances were donated), so she was able to use it during the renovation, but she did have to forgo her oven, stove and sink for 9 days. Easy peasy. Here’s how we completed this project in 5 days:
Day 1 & 2: Demo and Reconstruction
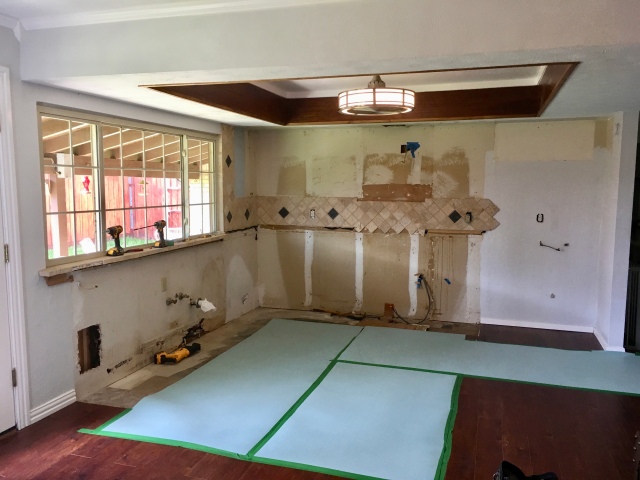
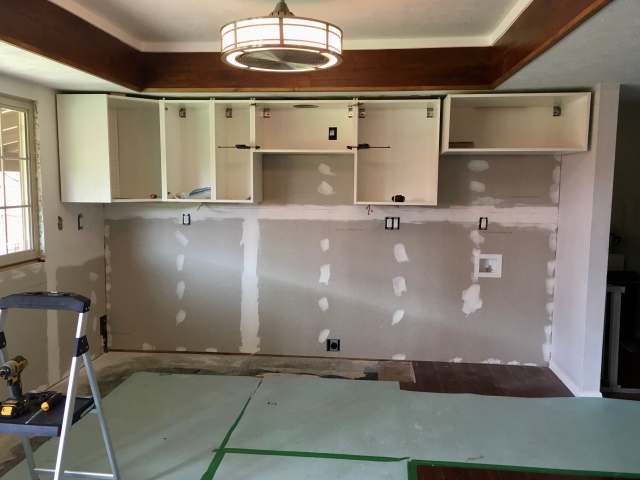
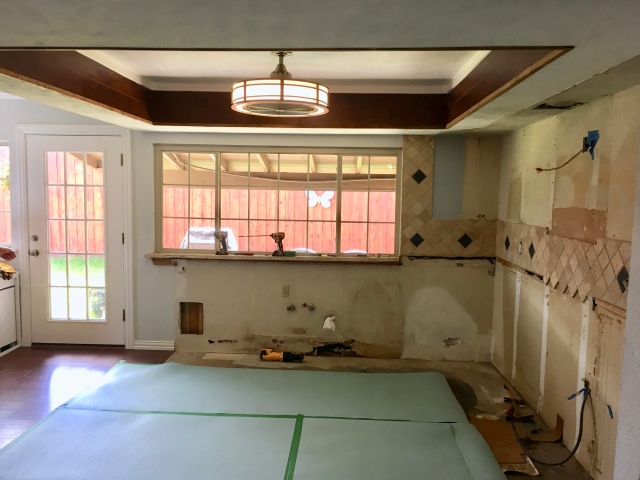
We removed all of the old cabinetry and appliances, and installed floor covering to protect the hardwoods from scratches and such. We ended up removing all the drywall on these two walls because we moved some electrical outlets and plumbing for the sink, and half of the drywall came down with the tile you see above anyways, so it was easier to replace all of it then to patch it. Once we could see what was happening inside the walls, we made a plan for electrical modifications and plumbing changes. Since we wanted to center the sink on the windows, we needed to move the plumbing over a mere 8 inches or so, which of course had a 2 x 4 stud in the way (womp womp). By the end of the weekend, we had:
- Completed demo
- Modified the electrical to add under-cabinet lighting, more/new electrical outlets, and a dedicated outlet for the range
- Shifted the sink plumbing to allow for centering the sink on the window, updating the plumbing in the process
- Added a new water valve to connect to the refrigerator water line
- Insulated the exterior wall
- Installed/taped/floated new drywall,
- Assembled countless cabinet boxes and drawers (not pictured)
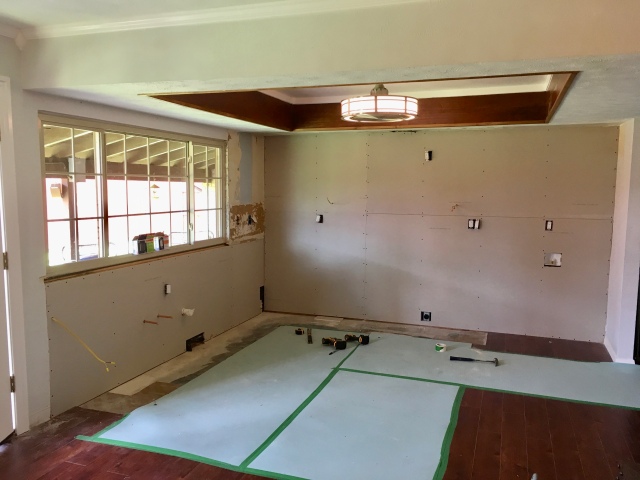
This was the state of the kitchen at the end of the first weekend. Fast-forward 5 days.
Day 3: Cabinet Install
When we returned the following weekend, the drywall mud was dry and the cabinets were ready to be installed. IKEA has a unique system for hanging their cabinets (even the lowers) that resembles a french cleat (you can catch a glimpse of it in the photo below, in the gap where the range will go). Once we figured out how it worked, it was pretty straight forward to install the cabinets. Its usually easiest to start with the upper cabinets so that nothing is in your way (i.e. you don’t have to reach over the lower cabinets to install the upper cabinets). Again, IKEA provided some useful schematics of the layout of the cabinets so it was easy to tell which cabinet went where.
We did have to modify a few of the cabinets. We drilled holes in the cabinet above the microwave for the vent pipe and the microwave’s power cord. And since the ceiling wasn’t quite level, (this happens in most houses), the cabinet above the refrigerator was just a couple inches too tall. So, we disassembled the cabinet, cut a few inches off each side piece, then reassembled the cabinet. Then we moved onto the lowers.
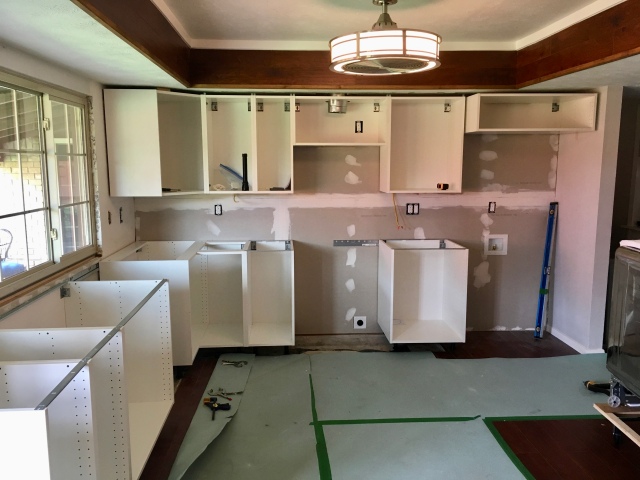
The lower cabinets went up pretty fast since we had learned a thing or two from installing the uppers, and cutting the holes in the sink cabinet for the plumbing (and electrical for the garbage disposal) was straightforward. Once the cabinets were hung, we installed the drawer slides and started to work on the refrigerator side panels and cabinet end panels.
Day 4: Countertops and Appliances
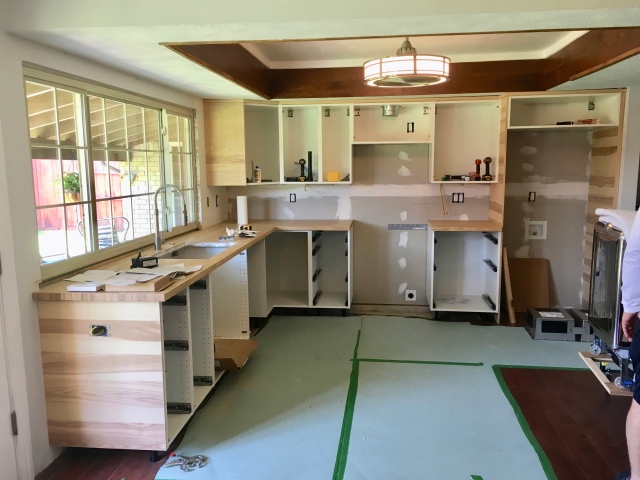
Claire picked out ash cover panels (which tie into the ash countertops) to encase the refrigerator (for a more polished, built-in look) and to enclose the end of the cabinet run. We installed these after all the cabinets were in as well as adding chamfer moulding where the upper cabinets meet the ceiling. Then, it was time to install the countertops. Since these are butcher block counters, we simply measured (twice, at least) then cut them to length with a circular saw. To cut the hole for the sink, we used the template provided by IKEA and a jigsaw. Since the sink sits in front of a large window, we chose to use an air switch for the garbage disposal instead of a wall switch. This allows you to install a button next to your faucet that controls the garbage disposal to avoid reaching past the window (the closest spot to mount a wall switch) or into the cabinet below the sink (requiring you to open the cabinet doors each time).
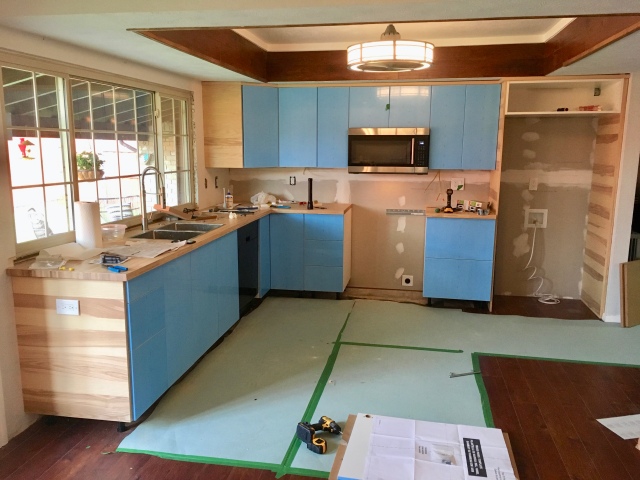
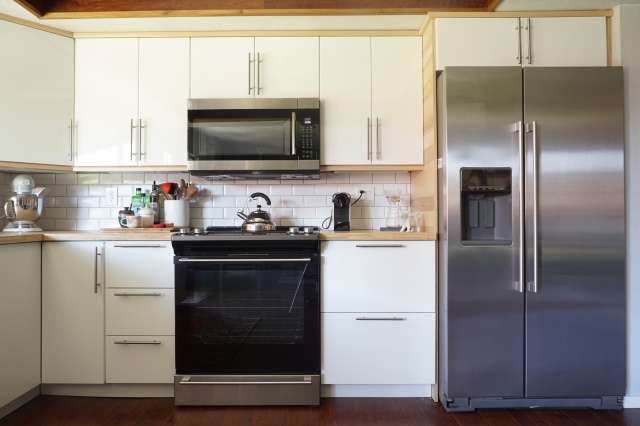
Once we installed the sink, faucet, disposal and dishwasher, we were able to start attaching the cabinet doors (the doors are not blue, that’s just the protective film covering them so they aren’t damaged during installation). The microwave came next, and it threw us for a little loop. The upper cabinets are 15 inches deep as opposed to the standard 12 inches. We installed the microwave and hooked everything up, then decided to give it a trial run to make sure everything worked properly. We opened the microwave door and it opened about 2 inches and wouldn’t go any further. The left side of the microwave door was butting up against the cabinet next to it, prohibiting it from opening all the way. This is when we realized that IKEA had sent a spacer, to be installed behind the microwave, to push the microwave forward the appropriate distance to avoid this circumstance (insert palm to forehead emoji here). Once we removed the microwave, added the spacer, then reinstalled the microwave, it worked great!
Next, we moved onto the range and refrigerator which didn’t give us near as much trouble as the microwave. The range came ready to be hard wired but since we decided to add a dedicated outlet for the range, we simply modified the range by adding a whip (essentially a piece of wiring with a plug on the end). Once the refrigerator slid into its spot, we could see the finish line.
At the end of day 4 (the conclusion of the second weekend), Claire had a fully functional (albeit not quite finished) kitchen.
If you remember, we had to modify the cabinet above the refrigerator to make it shorter, which meant the doors also needed to be modified. In order for the cabinet door hinges to attached property, we needed to bore a new hole in each of the doors. This required a tool that we didn’t have with us, so we brought the doors back to our shop to make the modification.
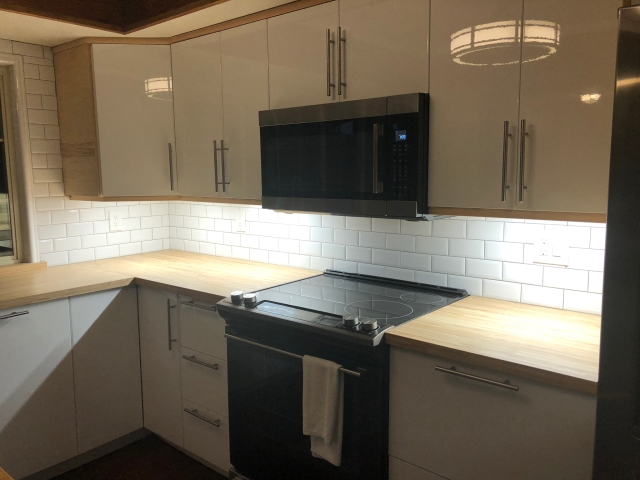
Day 5: Tile and Cabinet Hardware
On the fifth and final day of this kitchen renovation, the backsplash tile was installed (by a professional tiler), Claire added drawer and door pulls to the cabinets, and the dishwasher panel (this panel is the same finish as the cabinet doors, so the dishwasher is disguised) was attached.
And that, my friends, was a whirlwind kitchen renovation. We worked long days those two weekends to make sure we had a fully functioning kitchen at the end of day 4 (the conclusion of the second weekend). This would not have been possible without immense planning at the beginning of this project. Claire, the homeowner, had sourced all the materials, gathered them all, and double checked everything was on-site when we arrived. Otherwise, it would have been impossible to complete this renovation in five days. This is just a testament to how planning can affect the timeline of a project. Especially one as invasive as ripping out an entire kitchen.
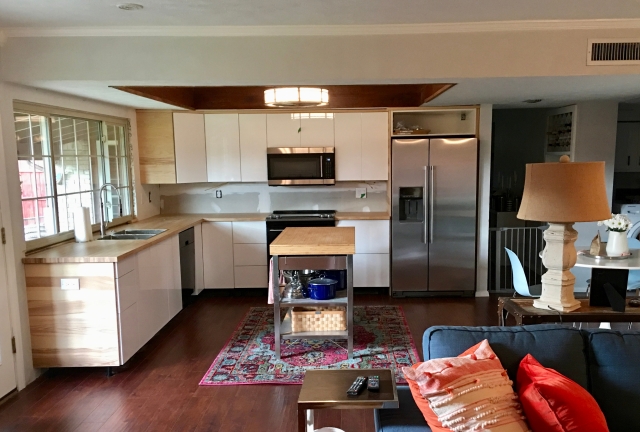
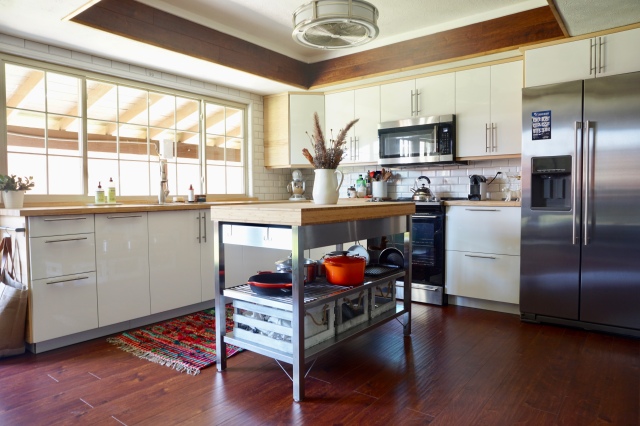
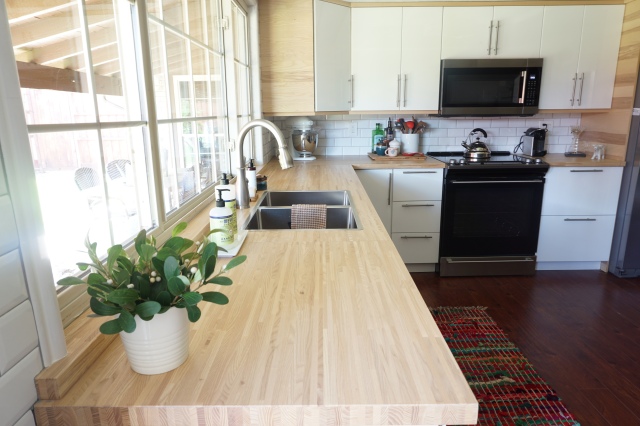
okay, I know, I’ll get to it already. The final product:
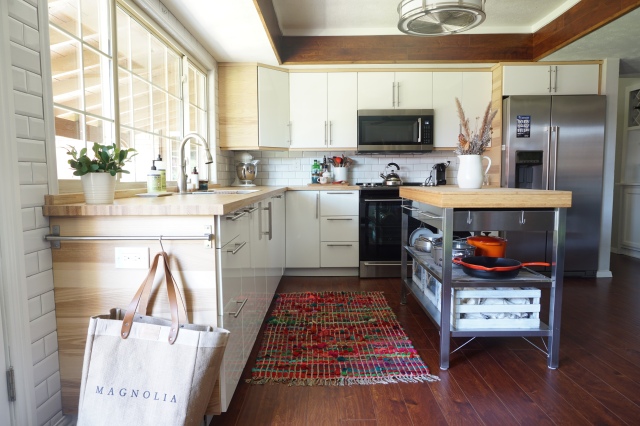
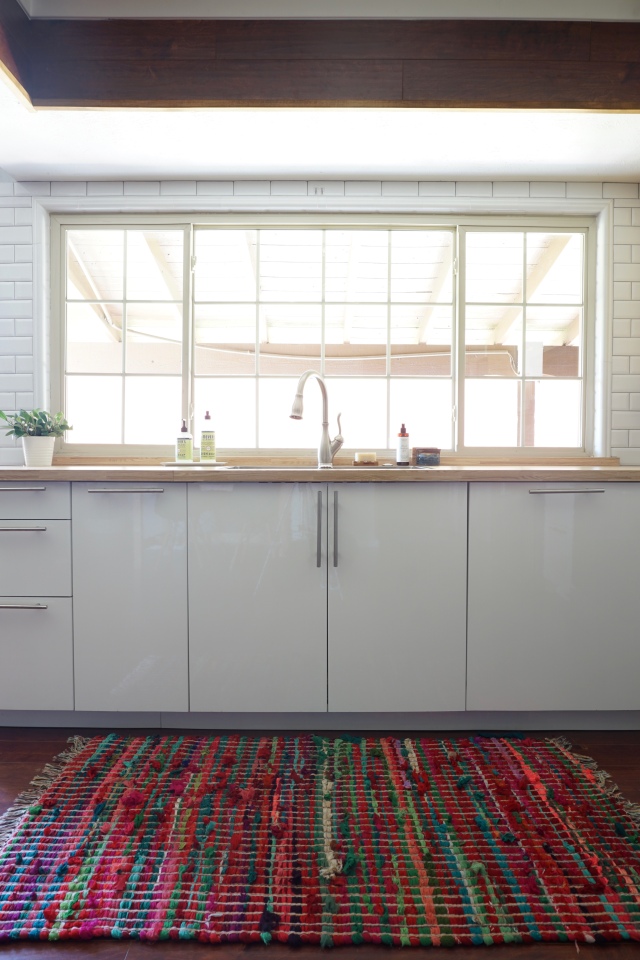
Claire chose to tile the entire window wall which was a major upgrade from where the kitchen started. It gives the windows even more prominence and highlight one of the best features of this room.
Remember where we started?
And now:
In my opinion, centering the sink on the window really elevated this kitchen.
It’s been almost two years since this project and everything still looks as good as it did the day it was finished.
Sources
- Cabinet boxes: IKEA SEKTION Series
- Cabinet doors: IKEA RINGHULT doors
- Countertops: IKEA PINNARP in ash
- Cover panels: IKEA TORHAMN (ash)
- Cabinet trim: IKEA TORHAMN (ash)
- Sink: IKEA NORRSJON
- Refrigerator: IKEA NUTID side-by-side
- Range: IKEA NUTID slide-in range with ceramic cook-top
- Microwave: IKEA NUTID microwave with exhaust hood (no longer sold)
- Dishwasher: IKEA (no longer sold)
- Kitchen island: IKEA RIMFORSA
- Backsplash tile: Bevel gloss ceramic subway tile in white
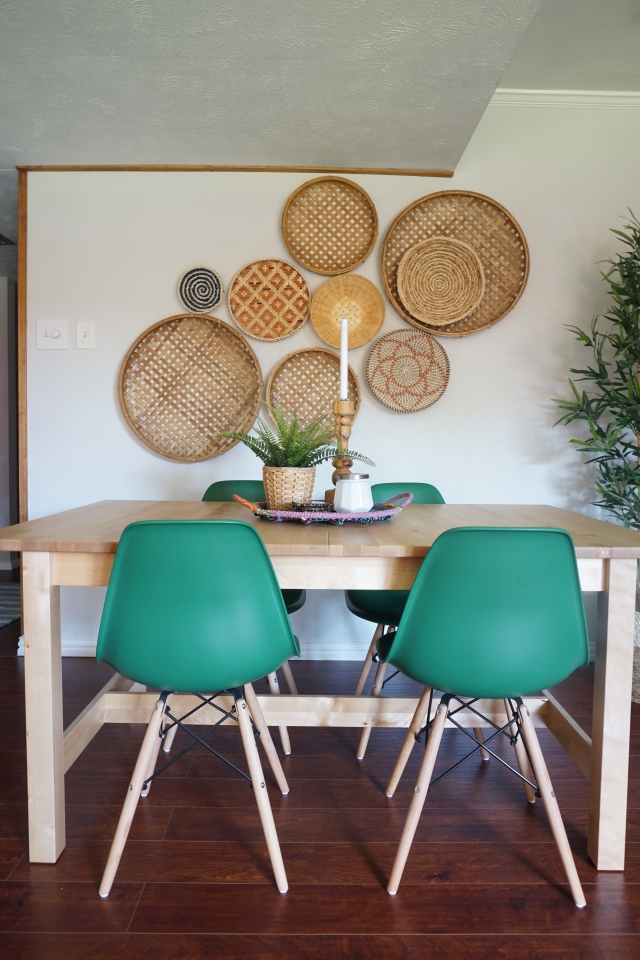
- Table: IKEA NORDEN
Are you dreaming up a kitchen renovation? Or in the middle of one right now? I’d love to hear about your plans. Comment below or connect with me on instagram @elleandjaydesign.


Love this! I’m also planning an IKEA kitchen remodel and am curious – what disposal did you install? It’s hard to tell what disposals will work with the Norssjon IKEA sinks. Thanks!
Hi Laura! We installed an InSinkErator brand disposal that we bought off the shelf at Home Depot. I think most generic disposals are compatible with the IKEA sinks.