

This weekend, Andrew and I spent some time organizing and cleaning our shop; we have a detached garage behind our house that functions as Andrew’s workshop and a guest space. Now, I’m not saying my husband is a hoarder, but he saves a lot of miscellaneous items *in case* he needs them one day. Which has proven useful before but this method can also leave you with a lot of accumulated stuff. And if you don’t have a system to store said stuff, then it gets hard to find, you can’t remember what you have, and then you end up re-buying stuff because you didn’t know you already had it or you can’t find it. I’ve been wanting to help him organize the shop for weeks now, but crummy weather kept forcing us to put it off, then, this past weekend we had beautiful weather so I dragged Andrew out to the garage begrudgingly.
Organizing is definitely a process and requires a certain mental state, if you know what I mean. So, I wanted to share the method I use to declutter, organize and clean spaces in my home.

1. Remove everything from the space*
Okay, I know this can sound daunting, but this will guarantee the best final product. Obviously this is easier the smaller the space. Its super easy to take everything out of your junk drawer or your desk drawers to organize. This gets a little trickier the larger the area, more on that in a minute, but it just takes a little creativity and forethought. Here’s why I think this step is important:
A) It gives you a chance to clean. If you don’t remove everything from a drawer or cabinet or closet, you can’t properly clean the area. If you are going through the hassle of removing most of the stuff, you might as well go the full distance so that you can vacuum, remove dust, and wipe down all surfaces so the things you put back in will stay clean. I’m sort of a clean freak in this regard, so this is a non-negotiable for me (I literally can not move a piece of furniture without vacuuming under it, its just not possible).
B) It gives you a chance to really see what you have. You think you know what clothes are in that drawer but I guarantee you will find something you didn’t think was there or you didn’t know you had. When I was cleaning out my desk drawers several months ago I found a book of stamps in a drawer that I would have sworn up and down I never put stamps in. But there they were.

C) When you clear everything out, it gives you a chance to reevaluate where to put things back. You are much more likely to put things back in the same spot if you don’t completely remove them from that spot. To get the best use of your space, you need to evaluate the best place for each group of items to live and this can change from time to time based on your needs and how many of each item you have. When organizing my desk drawer contents, I noticed I now have more pens/markers/writing utensils than I did the last time I organized it and they were spread out over several drawers. It made more sense to group them all together in one drawer so that all of my painting supplies could be grouped in another drawer.
You’re in this for the long game. This is one of those situations that definitely gets uglier before it gets prettier.
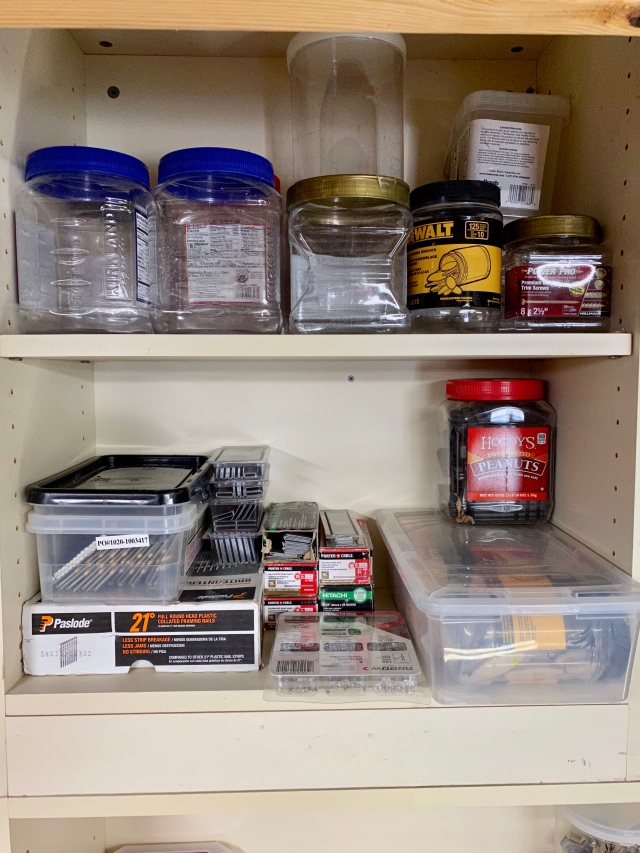
*In the case of our shop, which is home to approximately 573,269,963 things (If I counted every screw and nail we have, this might not be too bad of an approximation) I advocate working in sections. You will have moments where you find an item that might be better served in another section, which you have already tackled, and you’ll have to go back to that section and maybe even reevaluate (again) your storage solution. For example, we organized our hardware, picture frame/hanging materials, and furniture pad supplies as one section. If we would have found another box of hardware in another part of the shop that didn’t fit in the container we had already organized everything into, we would have had to find another container, thus re-doing some of the work we already did. This is why I advocate to take everything out all at once but there are projects where this is not realistic. Give yourself some grace and move forward.

2. Group like with like
Once you have everything out in the open, start to make piles of similar things. You will find out real fast if there are any duplicates or if you have an affinity for turquoise Ball jars (not that I would know anything about that). Once things are grouped with their like counterparts, you can start to pair down and edit. Discard anything that is broken or is missing pieces and inspect items to a make sure they are still in working condition. If you’ve heard of Marie Condo, this is the point where you would ask yourself if the items ‘spark joy.’ Things that do, go in the keep pile and things that don’t, go in the donate/sell pile.
3. Find (or purchase) containers
Now that you know what items you need to store and how much room they take up, you can find a container to put them in. If you are organizing your closet, you might only need to hang the items back up, and instead of needing containers, you might need to survey your hanger situation. When I did a massive overhaul on our closets, I went as far as taking everything off of the hangers and sorted the hangers as well. I found the majority of our hangers fell into 3 styles: black hangers with divots, white hangers with divots and white hangers without divots (any random colors or styles I donated). A little quick math allowed me to realize I could group our clothes in the closet by hanger type (okay, I know this is getting a little OCD). The black hangers were allocated for my husband’s long sleeve shirts and jackets, white hangers without divots for his short sleeve shirts, and the white hangers with divots for all of my shirts and outerwear. We have a tiny closet, so all of our other clothes are folded in our dresser. But this little (free!) shift of also organizing the hangers takes your closet to the next level, with minimal effort I might add.
But back to containers.
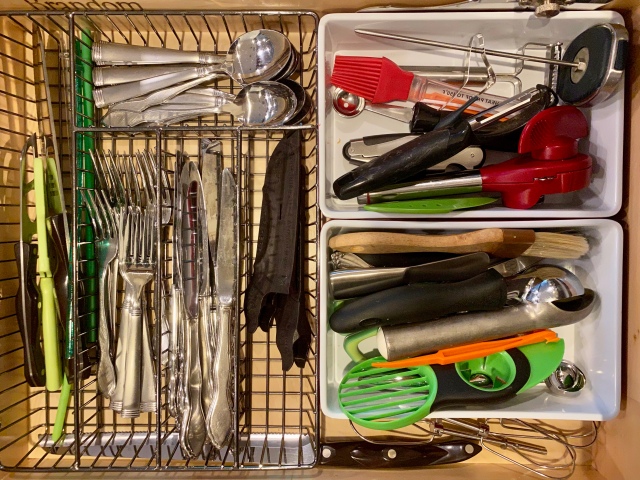
A) First, use what you have. Especially in spaces like kitchen/bathroom drawers where you wont see the exterior of the container anyways since it will be covered by the drawer sides. And since we are talking about drawer storage, you can use small Command Strips to hold your containers in place so they do not slide while you open and close the drawers (just adhere one part to the bottom of the drawer and one part to the bottom of the container and push together). Using mismatched containers, say in your pantry or bathroom cabinet, will not be as atheistically pleasing as matching containers but usually these areas are behind closed doors when entertaining company so they aren’t on display for everyone to see anyways.
If you have a space that is on display or you don’t have any containers lying around to use, then you might need to purchase some.
B) MEASURE FIRST! You know the saying ‘measure once, cuss twice.’ Thats how it goes, right? Anyways, measure your space/drawer/shelf/etc before going shopping. I am a person who has pretty good spacial reasoning skills and excels at visualizing if things will fit in a defined space and I still always measure for new containers. For spaces that I am continually (or currently) searching for solutions, I keep certain measurements in a note on my phone so when I come across something that might work, I can easily check to see if the size is right. It saves me a trip back to the store to return things that don’t work!
C) Search other departments. Just because its in the bathroom section of the Container Store doesn’t mean you can’t use it in your kitchen. Or office. Or bedroom. When I am on the hunt for organizational containers, I leave no section of HomeGoods unturned. Look, look, then look some more. I’ve used silverware drawer inserts to organize votives, divided serving trays for corralling kitchen gadgets and have a planter on my desk that holds my pens. The moral of the story here is: think outside the box and ask yourself “is the size right?” and “will it serve the right purpose?”
D) Buy more than you think you need. Unless you have measured/counted all of the items you need to store, its difficult to know exactly how many containers you’ll use. And nothing is worse than not being able to finish your project because you need to go back to the store and the store is now closed. This method doesn’t necessarily save you a trip to the store, because inevitably you will have extras that you then need to return. But that can be done at a later date (you know you’ll be back at Target next week for something else…) and your project can still come to a satisfying end.

There are two exceptions to this. 1) If you are a person who never returns things, don’t think this time will be any different. Just buy a few containers, then go back if you need more. Its pointless to organize your space only to fill it with extra things you don’t need and aren’t using. 2) You already own some of the same containers you need to buy. I keep the majority of my kids toys in these Sterilite totes (they come in varying sizes) so when I find the need for a few more, I just empty out the ones I have and try the new toys in there for size. Then I just make a list and buy exactly what I need.
And if you happen to be in the market for some new organizational bins, here are a few of my favorites:
- OXO Pop containers – I use these for pantry items
- Sistema Bakeit containers – these are great for all of my baking flours and sugars
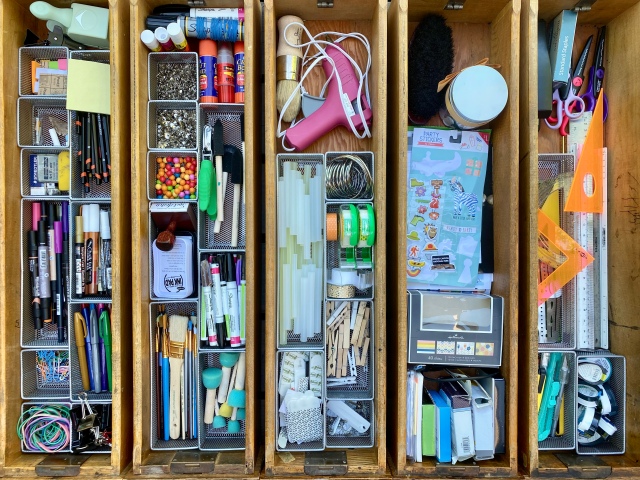
- Mesh drawer organizers – these are used in my desk drawers
- Sterilite clip storage totes – as I mentioned above, I use these for kids toys and art supplies
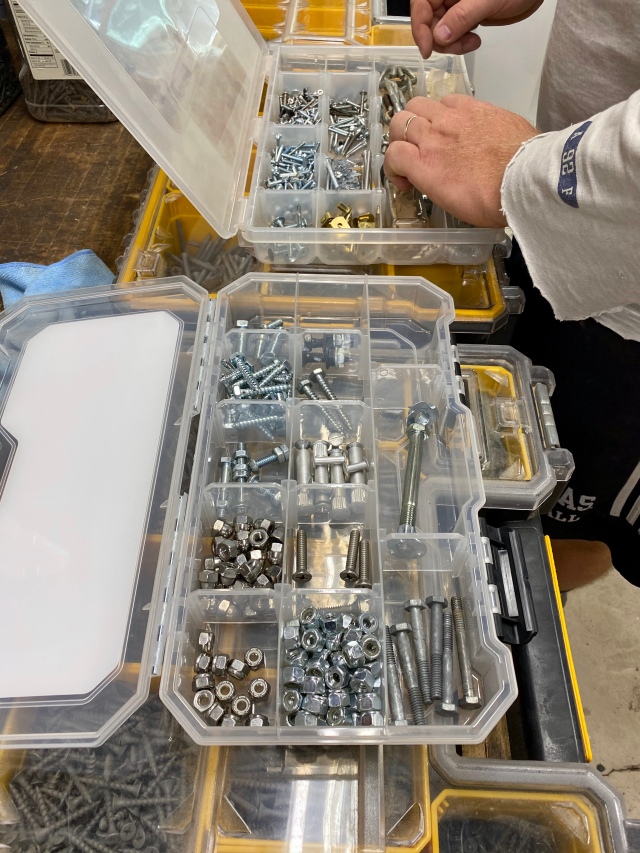
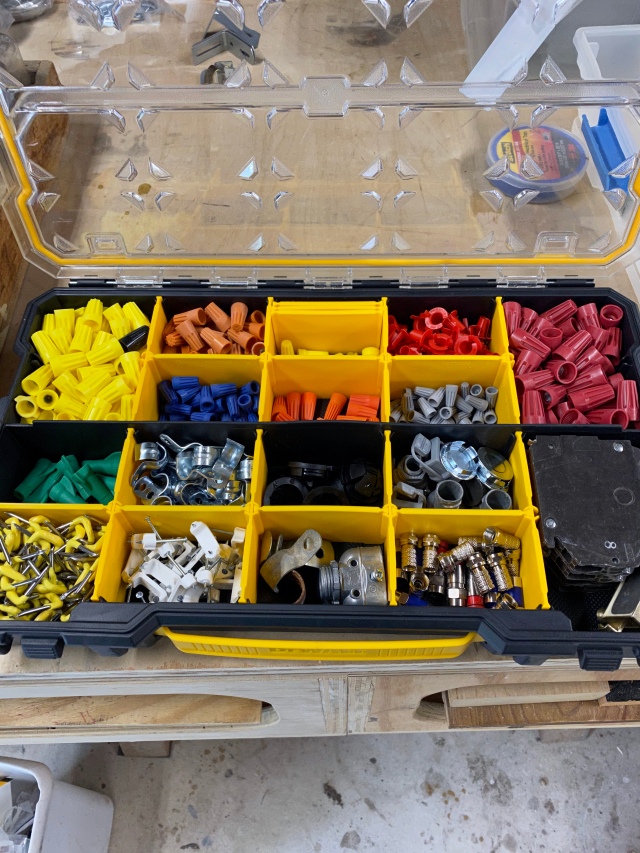
- Dewalt deep pro organizers – this is what we use in the shop
4. Fill your containers
Or bins. Or drawers. Or hang your clothes back up. In other words, put your stuff into a storage device and back into its home. Now, because I’m a clean freak, I also encourage you to clean the items before putting them away. Just a quick wipe down or vacuum should do the trick. As you are putting things away, be conscious of their location. Rarely used items should go down low or up high. Sweaters and extra linens go in the bottom drawer of my dresser because they don’t get used very often. The prime real estate is in the top drawer (for undies, bras and socks) that get worn daily. Same goes for your kitchen, Christmas platters and fancy bowls go on the top shelf since they are used sparingly.
Another thing to consider is how and when you use items. Most days, I make a chai latte for a morning snack, so all of my ingredients (except the milk of course) are grouped in one cabinet near the stove. Even though that means the cinnamon and nutmeg are not grouped with the other spices and the honey is not in the pantry with the other condiments. Since I use these items together often, it makes sense to group them outside of their natural counterparts. This technique can also be helpful for morning routines or making school lunches – group all the items and tools necessary for that task in one place so you do not have to waste time getting stuff from 3 different locations in order to complete the task.

Those are the four steps I use to organize spaces in my home. Do you feel ready to take on an organizational project? Or have you already in this quarantine time? I’d love to hear about it. Comment below or connect with me on instagram @elleandjaydesign.