

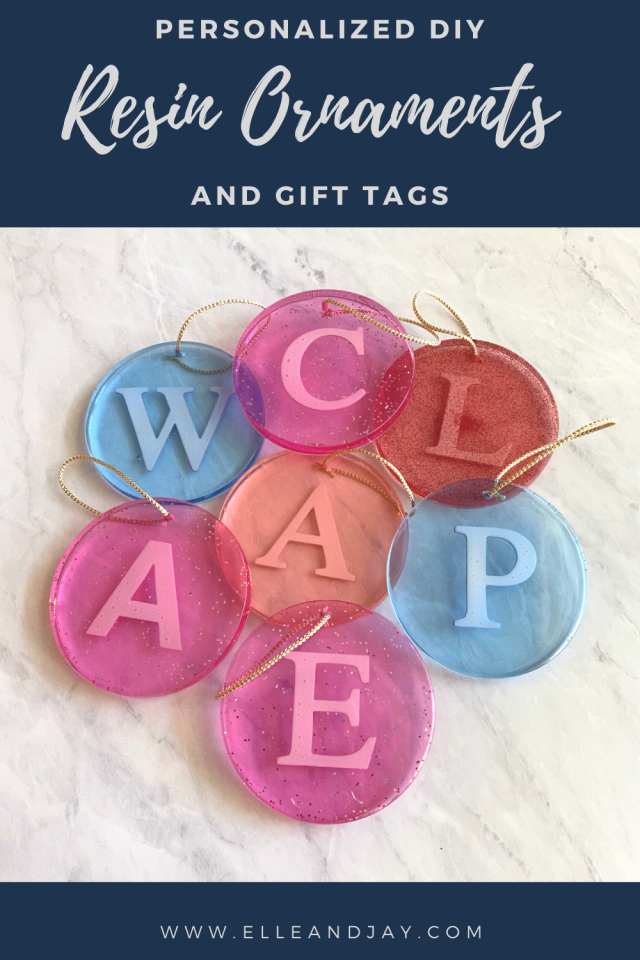
Its that time of year to deck the halls and one tradition I have is to make personalized ornaments for the members of my husband’s and my family. This is my 6th year to make custom ornaments and each year the list of names gets a little longer ;). As part of my tradition, I attach the ornament to each person’s gift to serve as a gift tag, hence why they have the first initial of everyone’s name, then the recipient can keep it as an ornament for years to come.

I knew I wanted to create something with resin after hosting a resin coaster Pinterest party in February. So, I created a few prototypes until I landed on the following process for making these personalized ornaments.
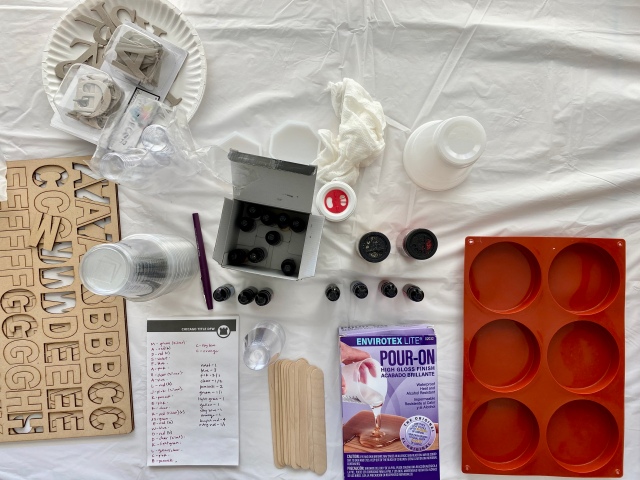
The Supplies
- Resin
- Round resin mold
- Graduated mixing cups
- Resin Dyes
- Craft sticks
- Glitter (I used gold, red and silver)
- 2″ Chipboard letters (I used these and these)
- White paint
- Small craft paintbrush
- Plastic cups
- Small plastic cups
- Drinking straw
- Sharpie/Marker
- String/yarn
- Disposable gloves
- Power drill
- 1/8″ drill bit
The Process
The first step is to prepare the chipboard letters. Chipboard is naturally a grayish-brown color, not something I would quite categorize as attractive, so I opted to paint mine white. I didn’t have any white acrylic craft paint on hand, so I chose to use spray paint I already had. The only spray paint I had was a gloss finish which did not adhere to the chipboard as well as I had hoped, but luckily, I also had white primer. I spayed two coats of primer and two coats of paint on each side of the letters, allowing them to dry in between coats. Both sides of the letters will be visible in the ornament, so make sure to allow the paint to cure fully before flipping to the other side.
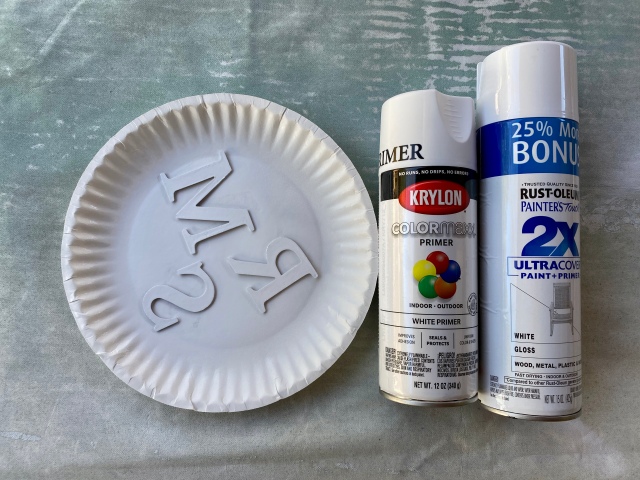
I used the gloss spray paint because I already had it, but if I were purchasing paint for this project, I would definitely choose a matte/flat finish because I think it would work best with the texture of the chipboard. Alternatively, you could brush on any white acrylic craft paint.
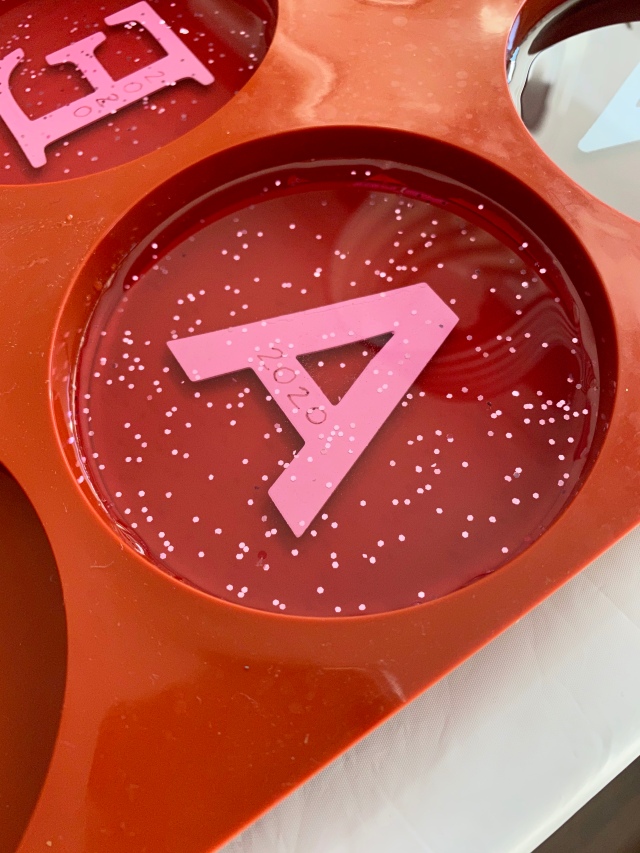
Since crafting personalized ornaments is an annual tradition for me, I include the year somewhere on the ornament (historically, on the back). So, once the paint on the letters was dry, I used a sharpie to write 2020 on the backside of each letter. Once the letters are prepped, its time for resin!


I wanted the chipboard letters to be floating in the middle of the ornament, but when I made a few prototypes, the letters kept floating to the top of the resin. Because of this, I poured the resin in two parts, allowing the first layer to harden before pouring the next layer on top. For the first batch of resin, I mixed 1 ounce of resin for each ornament. The graduated cups I use hold up to 8 ounces, so I mixed two separate batches to have enough resin for all of my molds.
I measured the resin, in a graduated plastic cup, according to the package instructions using a 1:1 ratio, then stirred for 2 minutes using a craft stick, making sure to scrape the sides and bottom of the cup. After the 2 minutes, I poured the resin into a new, clean plastic cup and continued to stir for another minute.

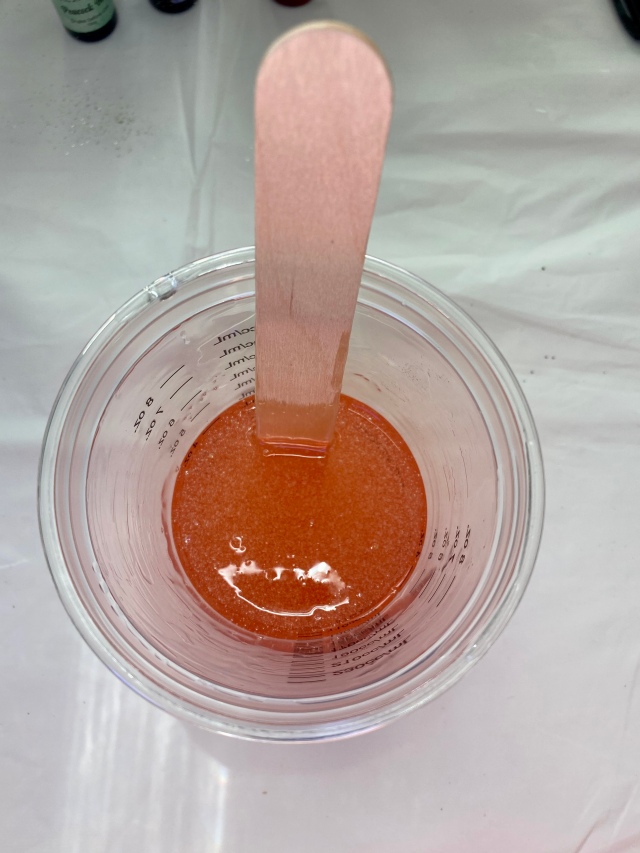
After the two part mixing process, I added my resin dye. I used 3 drops of dye for each ounce of resin, so if I was tinting 4 ounces of resin, I used 12 drops of dye. To make your colors more saturated, use more dye, but make sure to use the same number of drops/ounce in both layers of resin so the color is consistent throughout the ornament. Since I was using multiple colors, after the two-part mixing process, I poured 2 oz of resin into these smaller cups, then added the dye. If you are tinting all of your resin the same color, the smaller cups would be unnecessary.
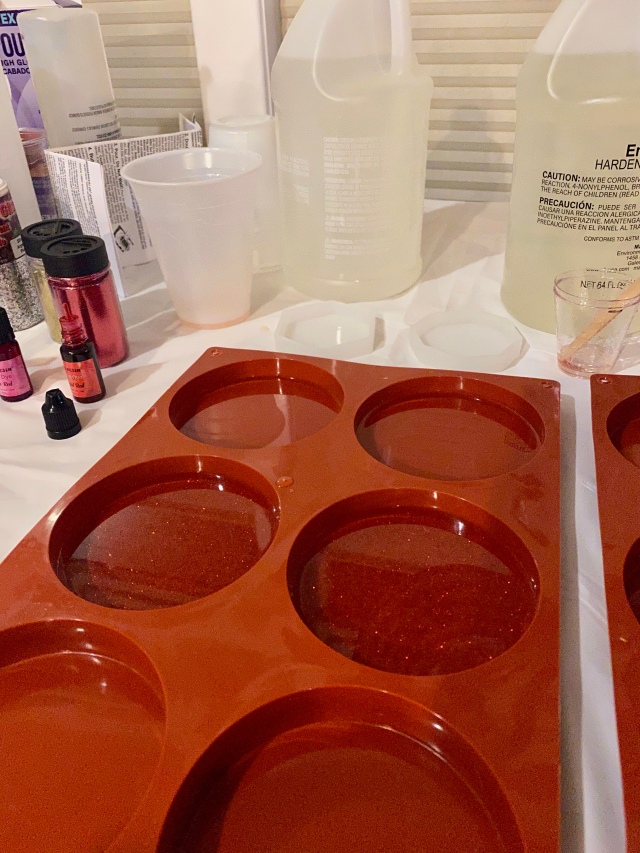
Once the resin was tinted, I poured 1 ounce of resin into each mold. Make sure to place your molds on a level surface, otherwise your resin will not be a uniform thickness. After the resin has a few minutes to spread out, use a drinking straw to gently blow air on the surface of the resin, this will pop the bubbles on the surface.
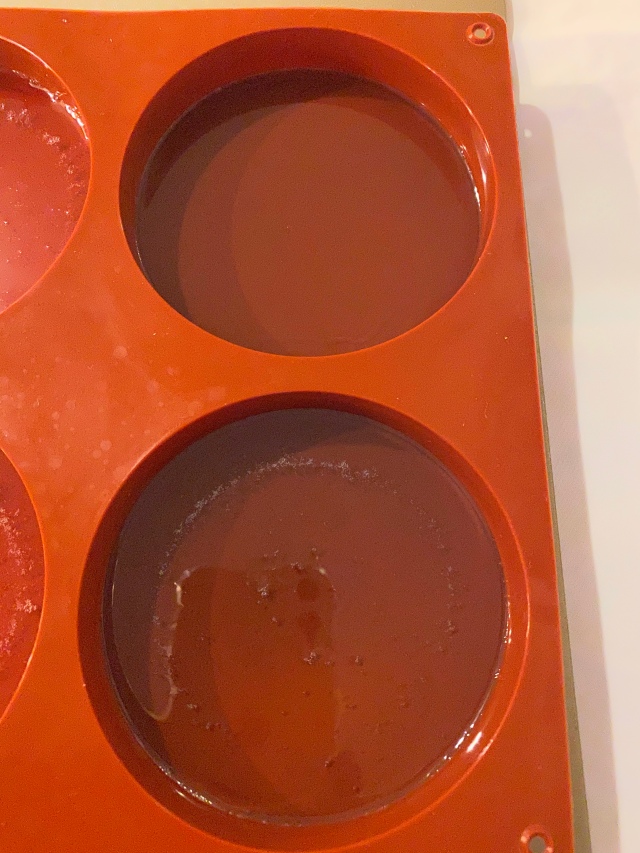
In the photo above, the bottom mold has just been poured and the top mold shows after I ‘popped’ the bubbles by blowing through a straw. If your resin has tiny micro bubbles below the surface, this could mean that your resin is too cold (about 75 degrees F is ideal) or your resin has come into contact with moisture, so make sure all supplies are completely dry when used.
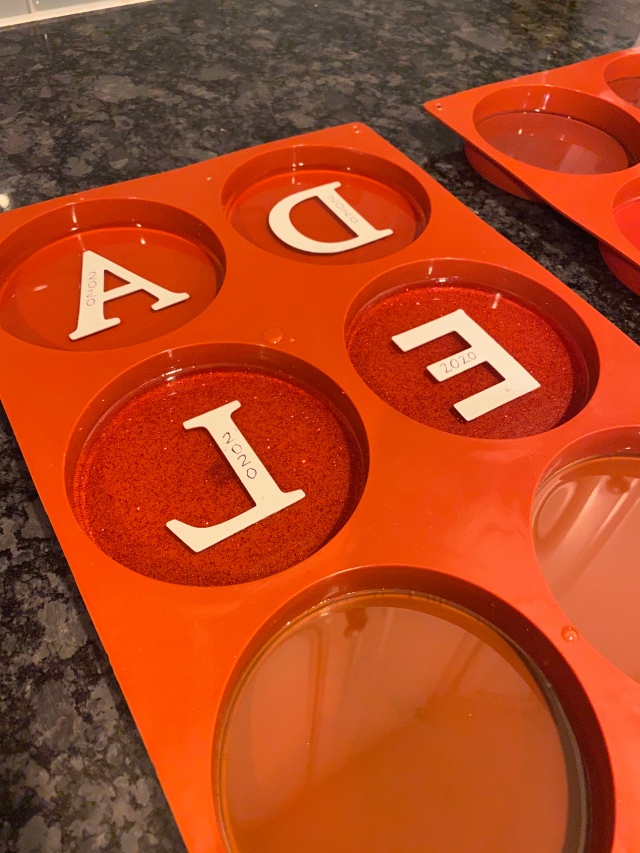
I waited about an hour, then placed the letters, upside-down, into the resin, centered in the mold (the bottom of the mold will create the front side of the ornament). I pushed them just far enough into the resin so the back of the letter was flush with the surface of the resin, but not so much that the resin overflowed onto the back of the letter. Use a straw again to blow out any new bubbles that arise.
After going through the process, I don’t think it was necessary to wait an hour after pouring the resin to place the letters. Originally, I thought the resin would be too liquid-y right after it was poured and it would be hard to get the letter to stay centered, but after making a few, I don’t think that was the case. I also had a few bubbles get trapped on the front face of the letters and I’m now wondering if that would have been minimized by placing the letters in the resin right away.
After adding the letters, I covered the molds loosely with parchment paper (you could use foil too) just to protect them from dust (or any stray gnats or anything) and let them cure overnight.
The next day, I repeated the process of mixing the resin, again using 1 ounce per mold. I also used the same ratio of dye and added 3 drops for each ounce of resin when tinting the resin for the second layer. You can use any amount of dye that you prefer, just make sure to use the same ratio for both layers of resin for a consistent color all the way through the ornament.


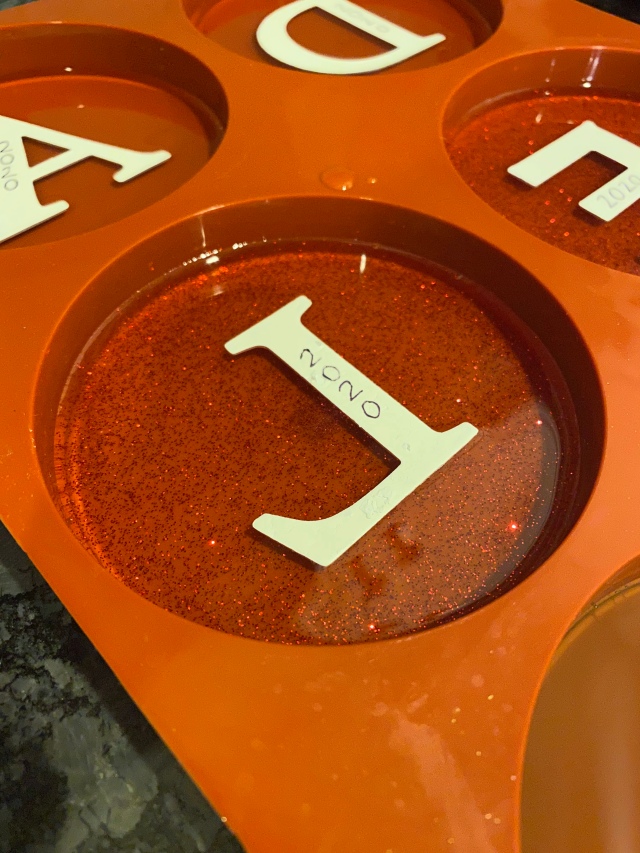
After the resin is tinted, add glitter, if desired, and stir until incorporated. Then pour 1 ounce of resin into each mold. If you noticed in the pictures above, I experimented with a few ornaments and added glitter to both layers of resin, but I much prefer the look of the ornaments that only had glitter in the second layer. I think the letters stand out better in the latter (they ‘pop’ more) since they aren’t partially blocked by the glitter. Here’s a side-by-side view:


These two ornaments used two different kinds of glitter, but hopefully you can see my point. I think the ornament on the right looks a little more ‘clean’ but to each his own. After adding the second layer of resin, I again used a straw to blow out all the bubbles, covered the molds loosely, then let them cure 24 hours. And just remember, it could take longer to cure depending on the temperature and humidity.

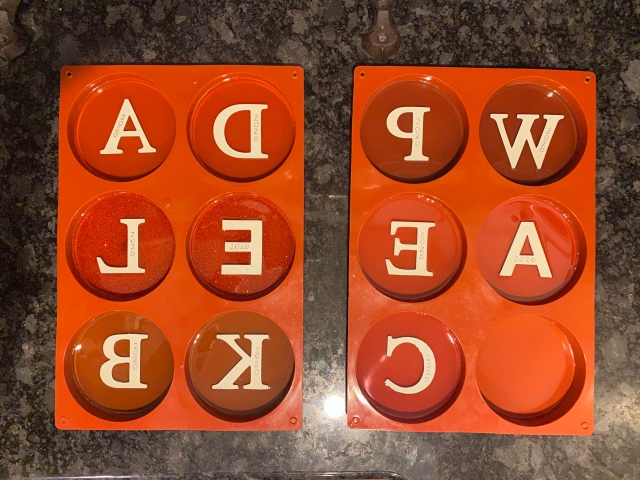
Once they were cured, I removed them from the mold and drilled a hole near the top of the ornament with an all-purpose 1/8″ drill bit. I used our drill press, but any handheld drill will work too.


I threaded string through the hole and tied it in a knot, and the ornaments were complete!

I love how these turned out and it was fun to customize the ornaments to everyone’s favorite color or the theme of their Christmas decor. This is a beginner level project and working with resin is not nearly as difficult as you might think.


What have you been crafting this holiday season? I’d love to hear about it! And to see more ornaments I’ve made from years past, check out my instagram account @elleandjaydesign.


These are beautiful!