

Hello everyone! There has been no shortage of projects going on over here at our house and much like the vanity I shared in last week’s post, I had another quick deadline to finish a project due to it’s traveling schedule. Months ago, I shared the plan for my sister’s master bedroom at her new house. She moved from a small townhome to a 3-bedroom single family home in early March and since then has been upgrading finishes and flooring, along with painting all the walls and trim. She is now at the point of furnishing some of the rooms, so we spent Labor Day weekend working on her master bedroom. Her room is about 13 feet wide and 16.5 feet long and because of the placement of the windows and doors, it makes the most sense to put her king sized bed along the long wall. This poses somewhat of a design challenge though because this leaves almost 5 feet on either side of the bed to fill – which leads me to the topic of today’s post.
When first starting to plan out Evelyn’s master bedroom, I used painter’s tape to mark out furniture placement on the floor. She already had a king sized bed, we picked out an 8′ x 10′ rug, and she had a dresser, everything else needed to be sourced. By playing around with the tape on the floor, we felt a 30″ – 36″ wide nightstand would fit the space well. So I took to the internet and started my search. I wouldn’t say it was hard to find nightstands in the right size – but it was hard to find nightstands in this size, that matched our design aesthetic, within our budget, AND that were in stock (thanks Covid) and available for purchase. I did find a few nightstands that were close to what we wanted, but not quite the one. You know?


When I couldn’t find something that would work, I focused my attention on DIYing something that would work. I really liked the shape and style of the two above (but not necessarily the colors), so I started looking around for something similar that I could modify. And thats how this Ikea NORDLI hack came to be.
I actually have never done an Ikea hack before (gasp! – I know….) but there’s a first for everything. And I’m no stranger to Ikea furniture, remember this post on the Ikea kitchen we installed? I chose to use the Ikea NORDLI series because I was able to purchase the drawers by themselves and didn’t have to waste money buying the top and base that would go to waste. Several people commented on my instagram account that they didn’t know you could just buy certain parts of a piece from Ikea, and for the most part you can’t. The majority of Ikea furniture comes as a set and you get all the pieces to assemble one entire piece of furniture. But the NORDLI series is different because it is a modular system that you can customize to have 1 or 2 columns of drawers and 2 or 3 rows of drawers, with two different drawers sizes to choose from. Based on what configuration you choose, you then add on the correct size top and base to complete your dresser. Because of this, you are able to buy pieces separately.
So on a trip to Ikea last month, I picked up two sets of these NORDLI drawers and assembled them one afternoon in my living room.


As you can see, the drawers come with sides and a back but no top and no base. From the front, they just look like 3 drawers without a frame. I’m not crazy about the ‘frameless’ look so even though I didn’t need to add sides, I did anyways. Once the set of drawers was assembled, I took them out to the shop to start building a frame around them.


Andrew started with building a frame for the base. Since you won’t see the base (as its the underside of the drawers) we didn’t need it to be one full sheet of wood. We used 1″x4″ select pine boards, and attached them with pocket hole screws.
We repositioned the drawers with the bottom facing up so we could attach the base frame; pocket hole side facing the drawers. I wanted the drawers to be inset – meaning the drawer front is flush with the nightstand’s sides and top – so the base frame is longer than the side of the drawers. You can see in the photo above how the base frame extends out past the sides of the drawer set and is flush with the front of the drawer.

Andrew attached the base frame to the drawer set using wood glue and wood screws, drilling pilot holes first. Be very careful when attaching this part because the Ikea sides and back are just particle board and can split very easily.

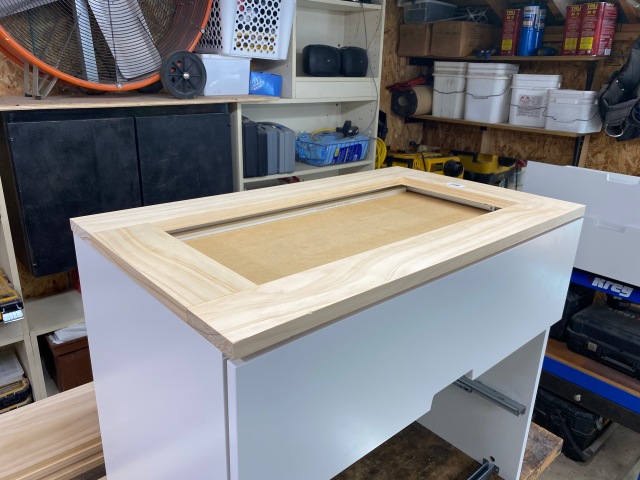
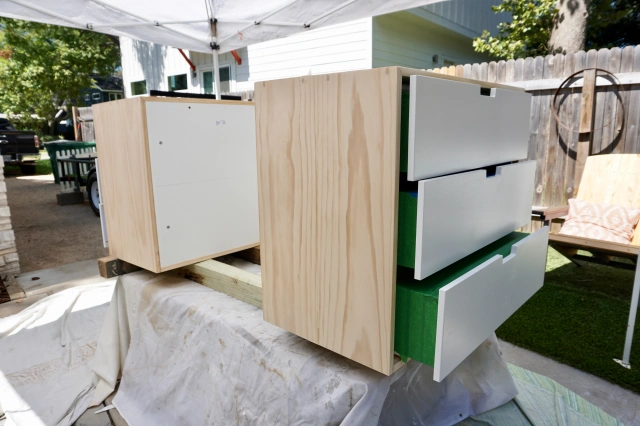
We flipped the drawers back over and now we had a sturdy base for our nightstands! That was by far the easiest part of this project. For the sides and top of the nightstands, I wanted it to look like one solid piece of wood with a waterfall edge. It is not very cost effective to buy a piece of wood 18.5″ wide (nor could you find one at your local home improvement store) so we opted to buy 1″x10″ select pine boards and pocket hole them together.
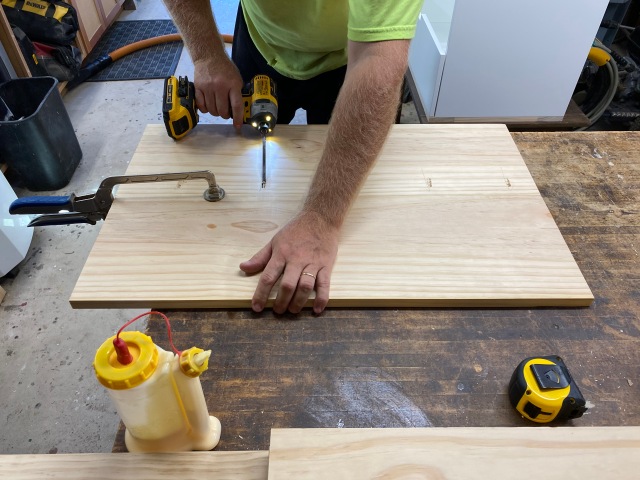
We used this same method for both the sides and the top of the nightstands. Once we screwed the boards together to create the correct width for the sides and top, we cut them to length using our circular saw set on a 45 degree angle.


Andrew used a spare board and clamps to make a guide for the circular saw to rest against as he cut a straight line. Because I didn’t want to see the exposed end of the pine boards on the top or side of the nightstands, Andrew cut the pieces at a 45 degree angle so they meet perfectly at the edge (this is called a waterfall edge). This is no easy feat without having fancy tools, so there may have been a few curse words mumbled as we tried to get everything to line up nicely.


Once all three pieces were cut, Andrew glued the seams together, then drilled pilot holes and screwed them together as well, countersinking the screws.


We attached the new wood panels by adding a few screws on the inside of the drawer box, since you will never see this area as it is covered by the drawer sides. Adding this wooden frame around the set of drawers made them look way more finished – like a real piece of furniture.

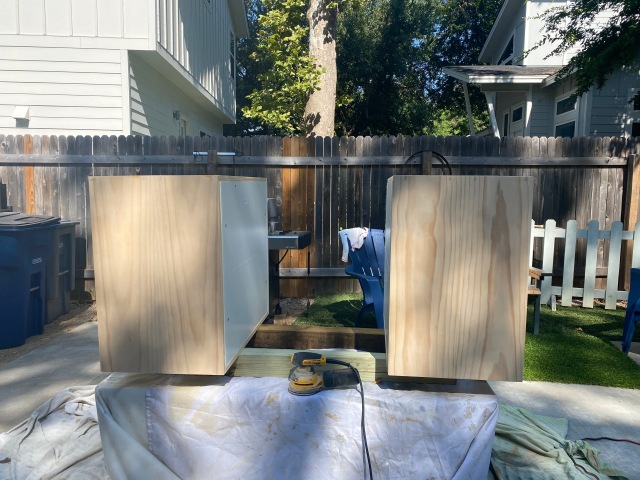
We filled all the screw holes and seams with wood putty/wood filler, let that dry and set, then sanded everything to prep for painting. I set up my paint station outside so I could spray the nightstands with my favorite Critter siphon gun. I bought this paint sprayer back in March as a birthday present to myself (on sale too!) and it has been one of my favorite (dare I say THE favorite) DIY tools I own. Its quick to set up, easy to use, and most importantly, easy to clean. This is not sponsored by any means (but if you know how to make that happen, let me know!), I just really like this siphon gun for small furniture projects like this. If you already have an air compressor, its well worth the money for small paint projects.
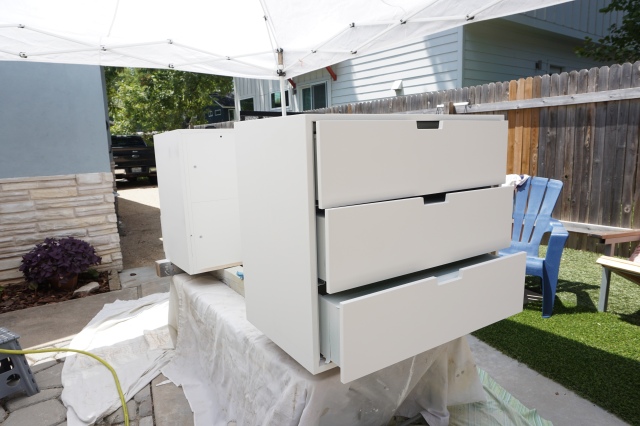
Whenever I paint a dresser or furniture with drawers, I like to tape off the drawer box itself, then place the drawers back into the furniture piece, leaving the drawers sticking out a little.
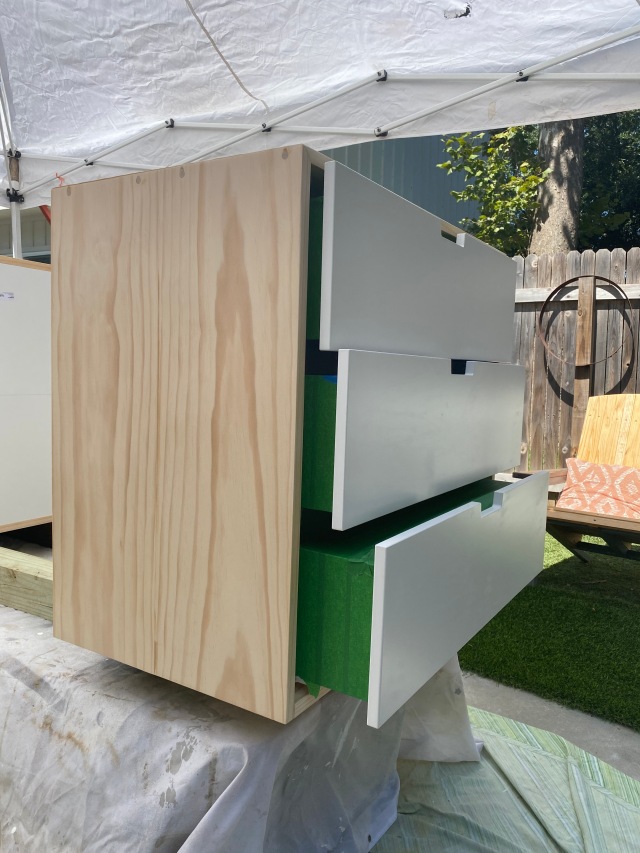
This allows me to paint the front and sides of the drawer fronts while not having to tape off the inside cavity of the nightstand or otherwise get a bunch of overspray paint in there. It also keeps everything compact and in a smaller area of space since you dont have to have another spot to set up the drawers. Similarly, its much easier to paint the drawers while in this position than if they are standing up on the floor, which requires more bending over and a less than ideal angle of the spray gun. This method isn’t fool proof and does take time to prep, but I much prefer it to anything else I’ve tried.

To protect the drawers even further (and use less painters tape), you can tape kraft paper over the entire top and sides of the drawer box. You can see an example of that with this dresser makeover I completed several months ago. Also, since this is an Ikea piece that I had to assemble, I thought about painting the fronts of the drawers before assembly (or un-assembling them when I got to the painting step) but ultimately ended up using the method above. We did need at least one drawer assembled when adding the wood, so I could have assembled one drawer, left the rest unassembled, then removed the front from the one drawer and painted everything. And if I did this project again, I think I would try that, but at the time, we didn’t know we wouldn’t need the drawers assembled. This method would require you to tape off the inside of the nightstand though to protect the hinges from paint if you are spray painting. If you were using a roller, this actually might be the easier way to go.
And now they were ready for paint! Sidenote: I rather like the natural wood and white look that you see above and with another project I would love to do something similar with some stain quality wood and stain it or even just clear coat it, but that style just didn’t match with the design aesthetic of my sister’s room. She already has some different wood tones in the room and the white wasn’t quite right, so I picked out a perfect shade of muted pink for these nightstands.
I sprayed two coats of Sherwin Williams Wall and Wood Primer on the nightstands, and I would say I waited for it to dry in between coats, but it was pretty much dry by the time I moved on to the next section, so I was able to do two coats without even stopping. Priming raw wood is essential to having a nice paint finish in the end, so don’t skip this step!
After priming, I noticed a little paint had made its way onto the back of the drawer fronts, which wasn’t a big deal during the priming step since it was white on white but I wanted a nice clean line when I painted on the color, so I added more painters tape after I primed. Before I had only taped off the actual drawer box, so I added another few strips of tape to the back of the drawer front itself.

You can see the painters tape covered by the primer (its white) and the new tape I added after priming (the new blue tape). This is another case for painting the drawer fronts before assembling them. You could prop them up ever so slightly and paint the fronts and sides fairly easily without having to tape anything. Also, since the drawer fronts are finished material, I did sand them lightly (before priming) to rough them up so the primer had something to stick to. Just don’t go too crazy since they are particle board and not real wood. I would not recommend using an electric sanding tool or anything, just a little ol’ fashioned elbow grease.

After the primer was dry, I lightly sanded, then sprayed on two coats of Sherwin Williams Emerald Urethane Trim Enamel in Abalone Shell. It was the perfect muted pink, almost a pinkish gray, for this project. My mom and sister actually thought they were white when I first delivered them. I let the paint dry/cure completely a few days, then added these black metal furniture feet. I love the way the nightstands look with these feet, but just a warning, the screws that came with them were not the correct size, so if you end up ordering these, be prepared to provide your own screws. The heads on the screws provided were too small and completely slid though the holes provided on the feet. Maybe my order was a fluke because I didn’t see this mentioned on any of the reviews.

I delivered them to my sister last weekend and they look great in her space! While I was there, we changed out some blinds, hung new curtain rods and curtains, and updated her bedding. We still have plenty to do before this room is ‘finished’ but I couldn’t wait til then to share these nightstands. We will also raise her bed so the mattress is closer in height to the nightstands. Her bed came with extenders to adjust the height of the feet to one of three choices, so we will play around with it to see which height feels best. And of course we’ll get some lamps and other decor to style these nightstands.

I mean, how good does this nightstand look with her rug?! I do have to say, I wish Ikea sold these drawers without the cutout cabinet pulls because I think you could customize this piece even more with some fun and unique hardware.
Cost Breakdown for two nightstands:
- 2 – Ikea NORDLI 3-drawer chests – $173.20
- 4 – 1″x10″x8′ and 2 – 1″x4″x8′ select pine boards – $137.95
- Paint & Primer* – $53.71
- 2 sets of metal furniture feet – $38.94
Total: $403.80 for two nightstands. Thats $201.90 for each custom nightstand. And at this size, that’s not a deal, that’s a steal! Also, I put an asterisk by the primer because I bought a gallon, knowing I’d use it for future projects, but I used less than a quart on this project.
And there you have it, my first Ikea hack! And I’m happy to report these turned out better than I had pictured in my head. What bedroom/furniture projects do you have going on? I’d love to hear about them. Comment below or connect with me on instagram @elleandjaydesign.


Looks so good Hannah! You guys are so talented!
Love them!