

I’ve waited a long time to share this story. Some of you know it very well, you’ve lived it with us. For some of you, this is your first introduction. Well, welcome! My husband and I bought our 1950 bungalow in May of 2012 and proceeded to do a gut renovation over the next two years (most of that while living there!). This is our first (and at the time of writing this, our only) house renovation thus far and our running joke is that we did everything twice. Hung drywall before our insulation was inspected? yup, sheetrocked twice. Bought the wrong size beams for the porch overhang? yup, erected the columns and beams twice. Built the wrong size cabinet for the laundry room? Yup, built it twice. You get the idea.
When we started looking for a house we had only a few criteria: we wanted a fixer upper in a neighborhood that when we went to sell, we would make money on, oh, and bonus if it had a pool. Spoiler alert: we do not have a pool. Thankfully, our realtor was a true saint and showed us house after house after house for 6 months before we finally stumbled upon this gem:
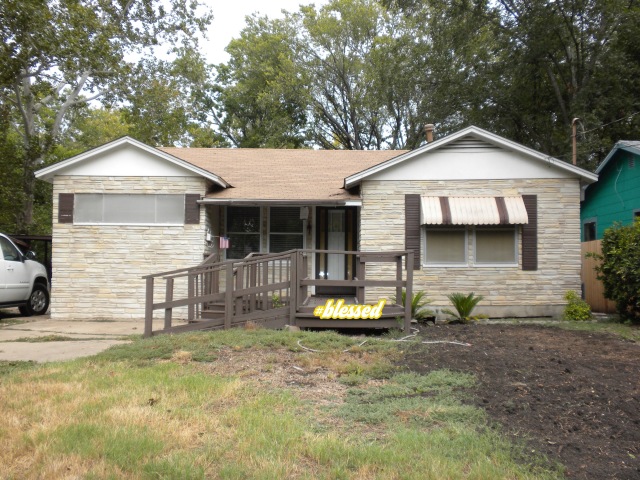
Somehow we were able to look past all of the ’70s updates and see potential in this 1,273 square foot bungalow with 3 bedrooms and 1 bathroom. The yard was actually worse better when we bought it, this photo was taken after replacing the main waterline that runs out to the street. The curb appeal came in handy when giving directions to our new place, we just told people to look for the house with the wheelchair ramp (which I have to admit, came in very handy when our appliances were delivered).
Layout
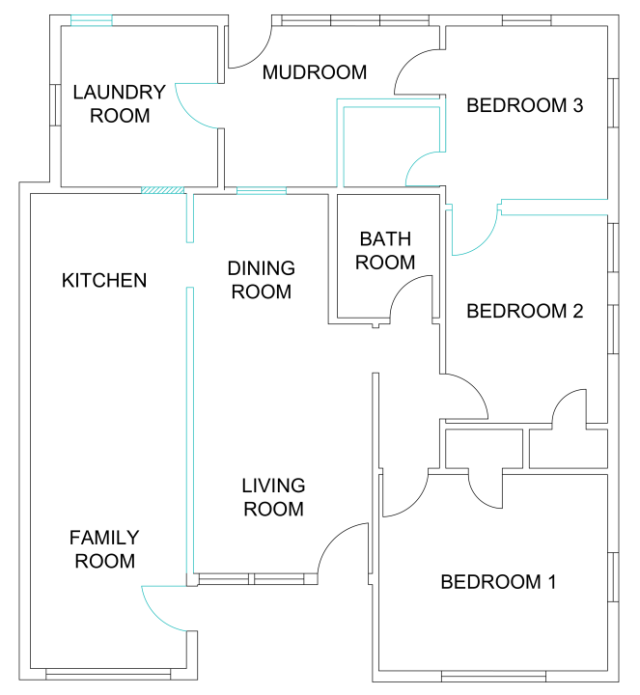
We first focused on the interior of the house and changing a few quirky layout things that didn’t fit our needs. To give you an idea, here was the floor plan of our house when we bought it:

The front door is shown in the bottom center of the layout leading into the living room. But what’s that other door you ask? Well, that was our second front door, leading to the family room. This house definitely had some quirks to overcome. Other notable flaws were the door from bedroom 2 to bedroom 3 (not a feature many people look for in a new home) and the maze required to exit the back door (one had to pass through the dining room, to the kitchen, into the laundry, and out through the mudroom to reach the backyard). Some of these attributes were due to a renovation the previous owner did decades before we bought it. Originally, when this house was built in 1950, it was a 2 bedroom, 1 bath that had an attached 1-car garage. The shaded parts below were not part of the original house.

The family room was originally the 1-car garage (hence, the shape of the window on that side of the house), which is why there was a door leading into this area from the front porch. Also, the mudroom and third bedroom were originally the back porch that were enclosed decades ago (hence, the window looking from the dining room into the mudroom – that originally was an exterior wall).
So, what did we change? It’s hard to tell from the floor plan, but the kitchen/family room area and the dining/living room area were two very narrow rooms (about 12 feet wide each) so the first priority on the list was to remove the wall separating the living room and family room to make one large room. Here’s a view looking at the front door from the dining room:

And here’s a view looking from the kitchen to the family room (once the 1-car garage):

Removing the wall between these spaces allowed us to expand the kitchen and gain a much more functional floor plan. We also closed in the second front door that led into the family room. Once the wall was removed, it didn’t make much sense to have two front doors within 8 feet of each other. In the kitchen, we closed in the opening leading to the laundry room, which gained us more cabinet space in both rooms. Then, we changed the window in between the dining room and mudroom into a doorway to connect the back 3 rooms to the rest of the house. In the image below, I highlighted all the layout changes we made.
In the laundry room, we removed the door (its now just a cased opening) and removed a window so we could install more storage. We removed the doorway between bedroom 2 and 3 and rebuilt the closet for bedroom 3 so it didn’t intrude into the mudroom as much. Oh, and that thick wall between bedroom 2 and 3?

It was this lovely built-in (with a matching white one on the other side). We removed that too. And here’s how the layout looks now:

I do have to say, the kitchen made the biggest transformation (with the laundry room suite coming in a close second) as far as gaining usable space. The original kitchen layout had an “L” shaped cabinet run that housed the stove, sink and dishwasher, and the refrigerator sat on the opposite wall all alone.


Please tell me you noticed those cabinets above the doorway. I told you it was a gem. After removing the wall (pictured on the right side of the kitchen, above) and closing up the doorway to the laundry suite, we had ample room for more cabinets and an island. Here is the layout of the kitchen today:

The sink moved to the island, with the dishwasher to the right of it. The stove remained in essentially the same spot with the refrigerator moving a few feet to the left of it. The other appliance shown (along the laundry room wall) is our under-counter microwave/convection oven. I’ll do a full post soon on the whole kitchen renovation, so you’ll have to wait patiently to see the after pictures of this space.
I hope you’ve enjoyed the initial tour of our house! I’ll be doing a whole Throwback Thursday series on each room and how we updated it, so stay tuned. Let me know what you think so far, I’d love to hear from you. If you would like to follow me on social media, you can find me @elleandjaydesign on instagram.


