

In addition to restoring our bungalow, Andrew (my husband) and I dabble in another form of renovation: furniture restoration. I have to admit, when it comes to these projects, I’m more the dreamer and Andrew is the doer. He makes my visions come to life. He has a garage full of tools and knows which one is the right fit for the job. I tell him what I want, then come back in a few hours, and like a good HGTV show, a transformation has happened. I’m usually there for the beginning part of sanding and cleaning, then come back at the end for staining or painting. But the middle part (where the magic happens) is all him. But enough about him.
Most of the furniture projects we work on come about from us picking up an item from the side of the street – from someone’s trash pile. We’ve been known to drive around our neighborhood in our pick-up (with the trailer attached) the day before bulk trash collection, just looking for treasure. The story of this dresser actually started a different way. Our neighborhood participates in a Buy-Nothing Project group on Facebook. This is a nationwide initiative in many areas of the country and you can learn more about it here. Essentially, you can give (or receive) items or gifts of service to others in your community free of charge. It’s a great way to get rid of items you don’t need anymore, and instead of giving them to goodwill (where someone will then have to come and pay for them), you can give items directly to someone who will use them.
So, as I scrolled through Facebook one day, this came across my feed:

Someone was just giving this away. Now, it was a little rough around the edges and had some water damage, BUT it was SOLID maple and just needed a little love. I immediately loaded my kids in the car and went to look at it. The owner of the dresser had disclosed it had sat in a sunroom that had flooded (which is where the water damage came from) and it had been housed under her carport for a bit so the drawers were swollen and wouldn’t close, but I just had heart eyes when I confirmed it was solid maple. The lower two drawers were in the worst condition with mildew and water staining.
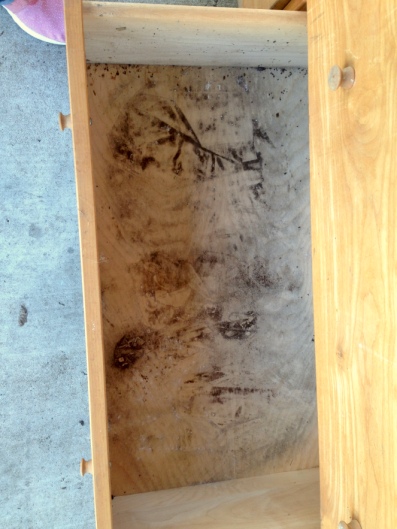

The back of the dresser also had some rotting from the water damage along the bottom edge.

But none of this was enough to deter me. So, when Andrew arrived home from work, I proclaimed we had an errand to run and he begrudgingly (I told you, I’m the dreamer) drove me back to the sweet owner’s house and loaded up the dresser. But once we got the dresser home and he confirmed for himself that it was SOLID MAPLE, he came around. Here’s how the dresser looked when we brought it home.

The first thing I did was clean up the drawers. I removed all six drawers and scrubbed them down with a diluted bleach mixture to kill all the mildew that had amassed from the water damage. Then I let the drawers dry in the sun. I repeated this process several times with the bottom two drawers (shown above) since they had the most damage. Next up was sanding. The dresser didn’t have a very thick finish on it to begin with (it was probably just oiled originally) so it didn’t take long to get down to raw wood.
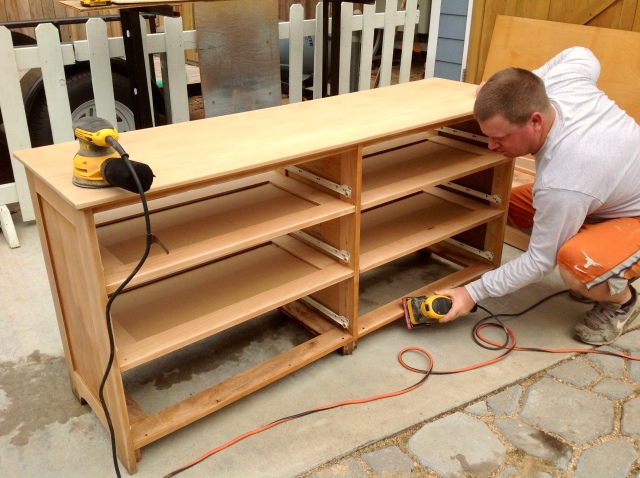
I should also add, we Andrew removed the bottom skirt (the strip of wood below the bottom drawers) from the dresser, as well as trimming the back panel to remove the rot. For the drawers, we removed the wooden knobs before sanding them.

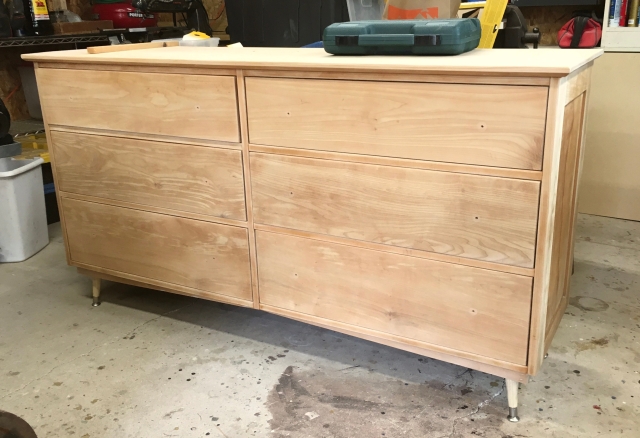
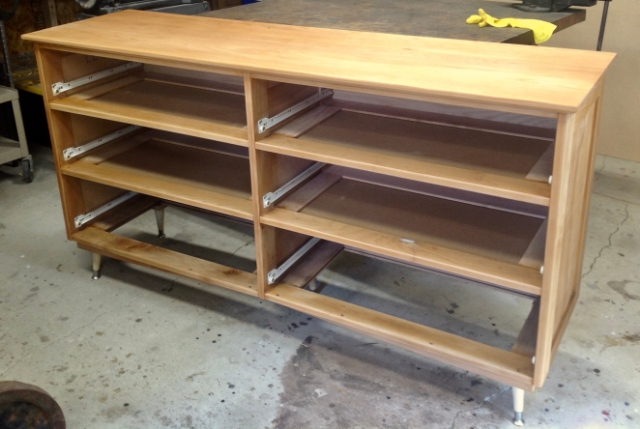
Okay, remember I said I was a dreamer? I have envied this dresser from West Elm for a long time and wanted to make our dresser a little more mid-century modern. Also, I prefer furniture with feet (or legs) over furniture that sits flush against the floor (as this dresser did). So, to jazz up this dresser, Andrew modified the skirt to be taller at the outside of the dresser and narrow at the middle of the dresser. When we reattached the skirt, we recessed it a few inches from the front of the dresser and added 5 of these feet we found at Lowe’s (1 on each corner and 1 in the middle). Here’s how the dresser looked after we sanded it and made our modifications:
Next, we applied stain. We have a stockpile of Minwax stains in our garage so we just used one we already had. We removed the drawers from the dresser and gave everything a good coat of stain.


Maple is notoriously hard to stain (it tends to get blotchy), so we chose not to go too dark. We did experience some blotchly-ness, so if we do another project with maple, I think we will try to seal the wood before applying the stain.
After the stain was completely dry, we applied three coats of polyurethane, with sanding in between coats. After everything was dry, we added new knobs and reinstalled the drawers. We originally planned to sell this dresser after we refinished it, but we liked it so much when we were done that it now lives in our guest room!

Here’s the before and after for you again.

Do you have any furniture projects on your list? We picked up another dresser last week (from the Buy Nothing group again!) so I’ll keep you posted on the updates we do. Also, I’m planning to do another post soon of other furniture makeovers we’ve done, so keep your eye out for that!


