Happy Fall ya’ll! The weather has finally started to change here in Austin, and we are enjoying the below sweltering temperatures. Last weekend, I had the pleasure of hosting another Pinterest Party, so today I’m sharing the process for making these simple mosaic planters.

For anyone who’s new here, I host craft nights, which I call Pinterest Parties, about every other month or so (when there aren’t global pandemics going on) to spend time with friends and be able to use my creativity. I choose the craft and source the materials, then my friends come over and complete the craft better than I could have imagined while we get to catch up and spend time in each other’s company.
I call my craft nights ‘Pinterest Parties’ because usually the craft idea comes from scrolling Pinterest, but this party was spawned from an article I saw in my Better Homes and Gardens June magazine. We used the information in the article as a guide when making the mosaic planters, along with some trial and error, and I’ve summed up all the steps so you can make one too.
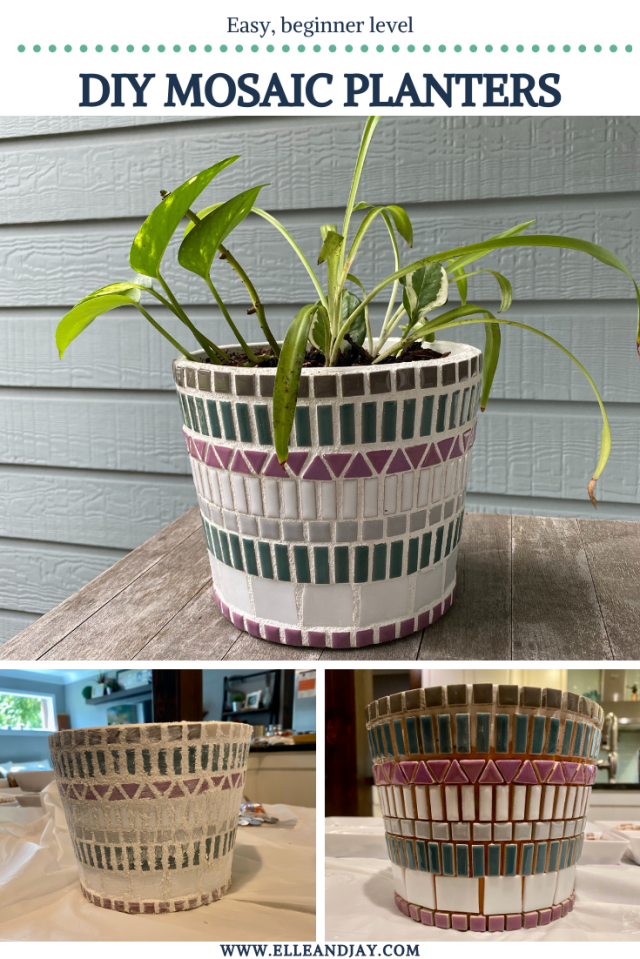
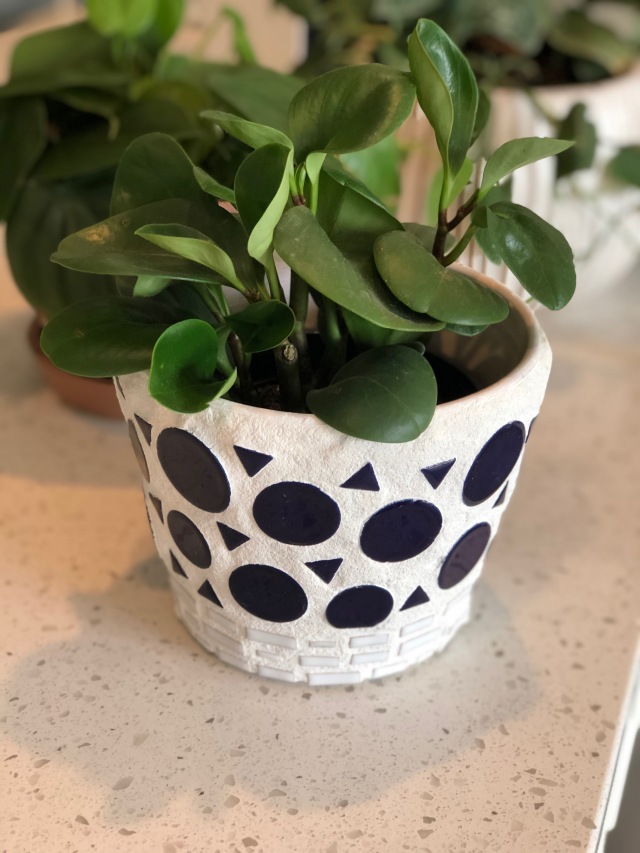
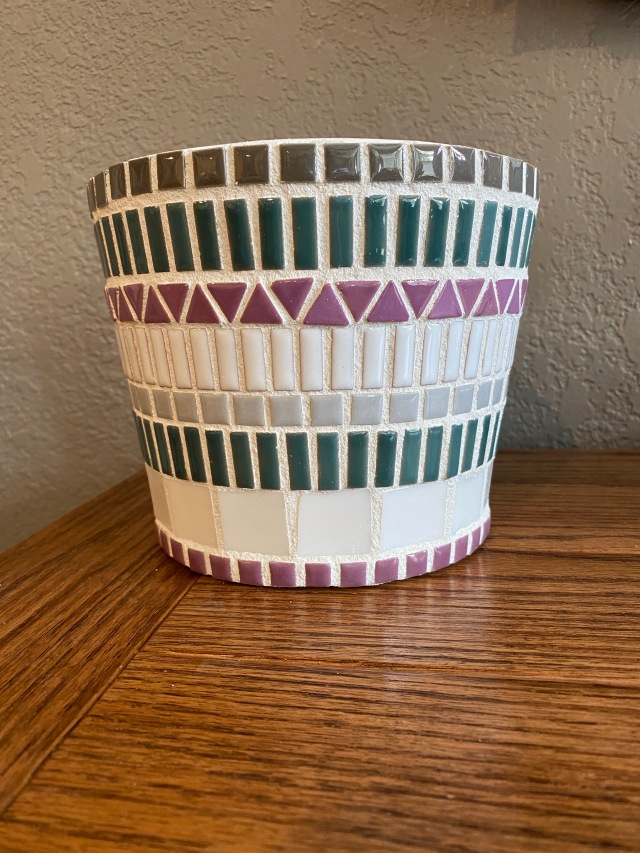
We actually worked on two crafts at this Pinterest Party (I’ll share the other one soon!), and I made the more structured geometric planter (above, right) and my friend Kellie made the more freeform navy and white planter (above, left). So, here’s how we created these mosaic planters:
The Supplies
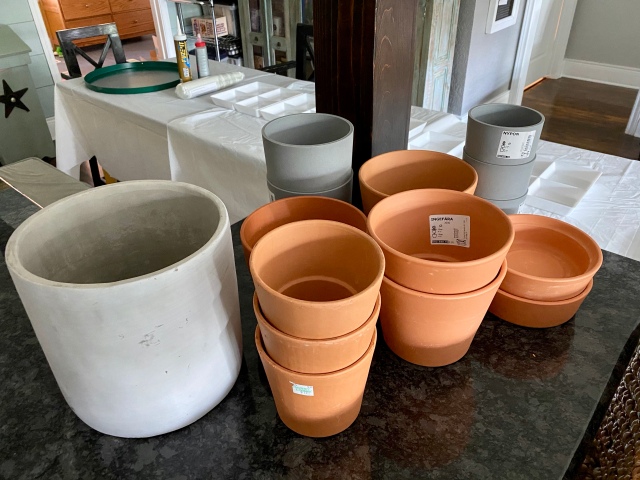

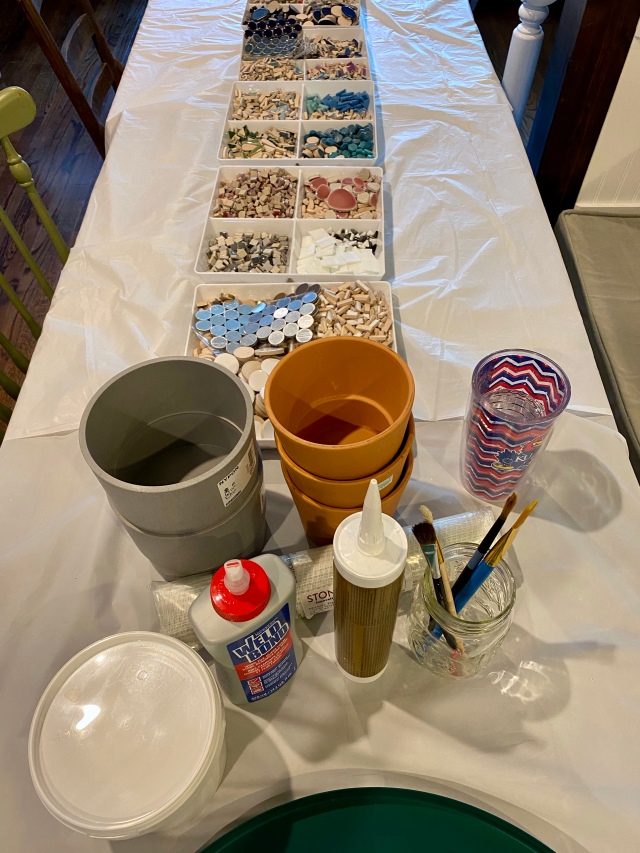
- Terra cotta pots (Ikea) or any other smooth surface pot
- Weldbond adhesive
- Mosaic Tiles (Funky Dreams Mosaics, Shining Eye Arts, Wit’s End Mosaic, Mosaic Trader USA)
- White paint
- Small craft paintbrushes
- Jennifer’s Mosaics white powdered grout
- Craft sticks
- disposable gloves
The Process


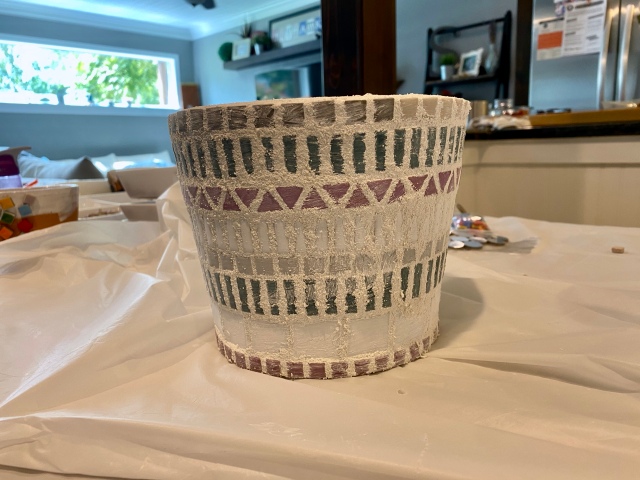
I picked out white grout for this project and because the terra cotta color didn’t really go with my color scheme, I painted the top inch and a half-ish of the pot, on the outside and inside, so it would look as if the pot was a nice clean white ceramic pot instead of an inexpensive terra cotta one. I was trying to avoid the situation where the tile and grout ended at the top of the pot, and then still being able to see the original terra cotta peek through on the top rim and inside portion of the pot that doesn’t get covered with soil. And I have to say, the paint did the trick. I just used some leftover white wall paint I had lying around but you could also use acrylic or craft paint.
The next step is definitely the most challenging of the entire project, and that is to pick your tiles and pattern. This can be as free-formed or structured as you want. I chose a very geometric, structured pattern, so it helped to lay out the pattern vertically to check the spacing between rows and make sure the top row of tiles lined up nicely with the top of my pot. Its not nearly as easy to lay out an entire row of tiles all the way around the pot horizontally, but remember, you can only see one side of the pot at a time (assuming you don’t put it somewhere where you can walk 360 degrees around it). This is important because a few times when I worked my way around the pot, building each row, I got to the end of a row and had a space that was too big for 1 tile but too small for 2 tiles, so the spacing of the last tile I placed in that row was a bit off. I just made sure to start all of my rows near this spot, so all of these beginning/ends of the rows would align vertically and become the ‘back’ of my planter.
You can also draw or sketch out designs directly on the planter using a pencil or marker. During this process, it occurred to me that it would have been nice to have horizontal lines drawn on my pot so I could check and make sure my rows were level. A quick sidenote: when purchasing your tiles, try to pick tiles that have the same thickness. If the thickness varies too much, it is hard to grout because the heights of the tiles are uneven.
To attach the tiles to the planter, we used Weldbond, an all purpose adhesive that dries clear. We applied the Weldbond to the back of each tile using a popsicle/craft stick dipped in a small amount of the adhesive (We just poured a small amount onto a plastic plate). Depending on the size of your pot and the size of your tiles, this could take a while. I would not say this was a quick process by any means, but this is definitely something you could do a little at a time over the course of a day, a few days, or even longer. Kinda like a jigsaw puzzle, you just put a few pieces in at a time, and after a week, ta-da, you have a 500-piece puzzle built.
I also didn’t think to try and squeeze a line of adhesive directly onto the planter, then attach 10-20 tiles at a time. I think this could work equally as well, remembering that a little goes a long way with the adhesive. With too much, the tiles start to slide around, and it can get out of hand with so many little tiles, so just start with a small amount of adhesive and you can always add more if needed. Also, the adhesive doesn’t dry too terribly fast, so you have plenty of time to adjust the tiles as you work.
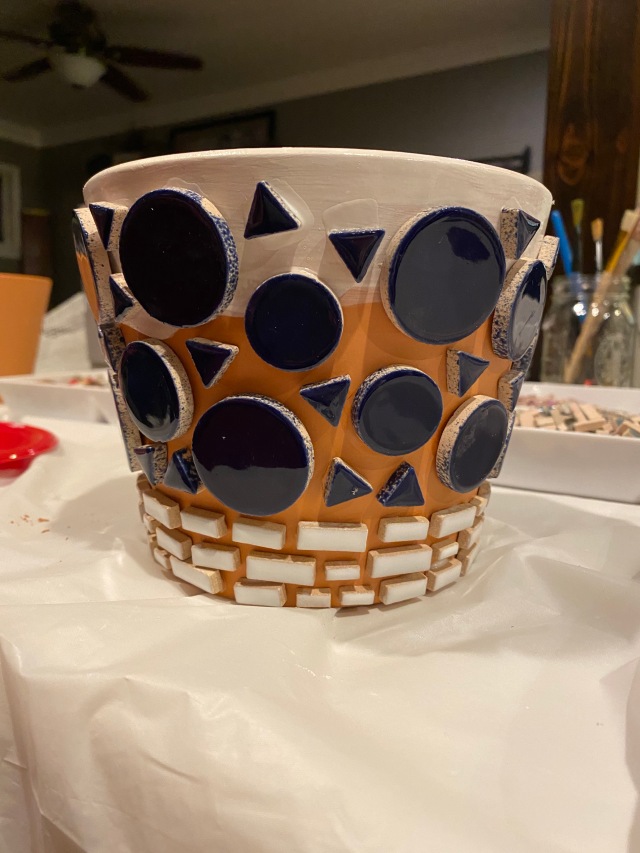
Blue Circles | Blue Triangles | White Rectangles 
See above for tile sources
After allowing the Weldbond adhesive to dry overnight, it was time for grout. We used Jennifer’s Mosaics White Powdered Grout, mixed to the package instructions. We applied the grout in an even layer using our hand, covered with a latex glove. Just smear it around until it fills all the nooks and crannies. Then try to wipe as much grout off of the tile faces as you can.
Let the grout dry about 20 – 30 minutes, then start to remove the grout from the tile. The grout directions said to “brush away excess grout using a scrubby or a soft brush” so I used a craft paint brush to brush the tile face, then used the other end of the paint brush to scrape the grout from the tile edges.
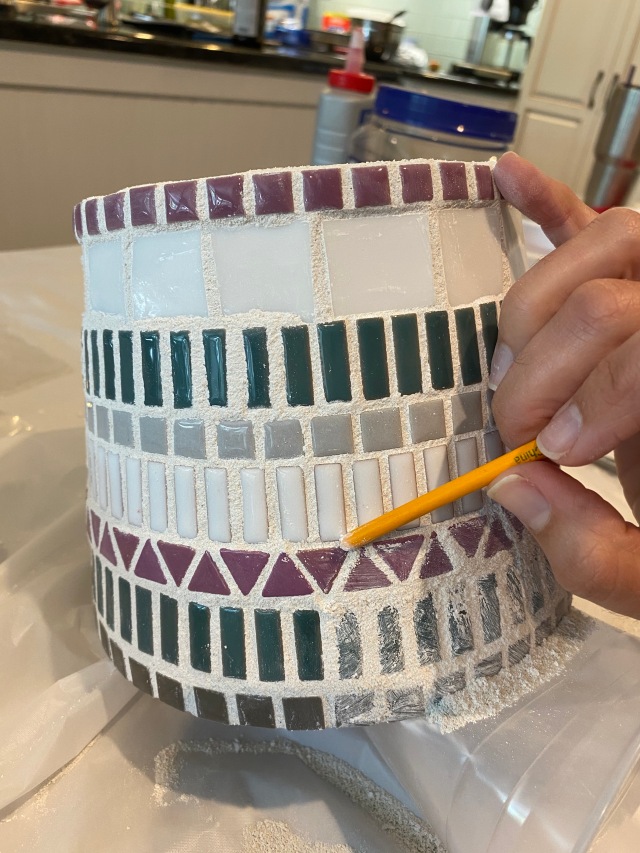

Once the majority of the excess grout was removed, I wiped the tiles clean with a wet paper towel. And that was it!

As far as skill level is concerned, this project is suitable for any beginner. There are not many steps and the grouting process is easier than you might think. But this project does have a hefty time commitment, especially if you choose a lot of small tiles or an intricate design. I would classify this as a weekend project since the application of the tiles and the grouting can take several hours each, and the adhesive needs to dry overnight. But as I mentioned before, you could easily spread the tile application step over several days or weeks, then grout when you are ready. Since I am still only hosting small gathering Pinterest Parties, my girlfriends came over on a Friday night to apply the tiles, then came back over that Sunday to grout.

I’m planning to make some more of these mosaic planters as Christmas gifts, so be sure to check out my instagram page for photos of my future creations. And if you are looking for more craft and Pinterest Party ideas, check out these posts:

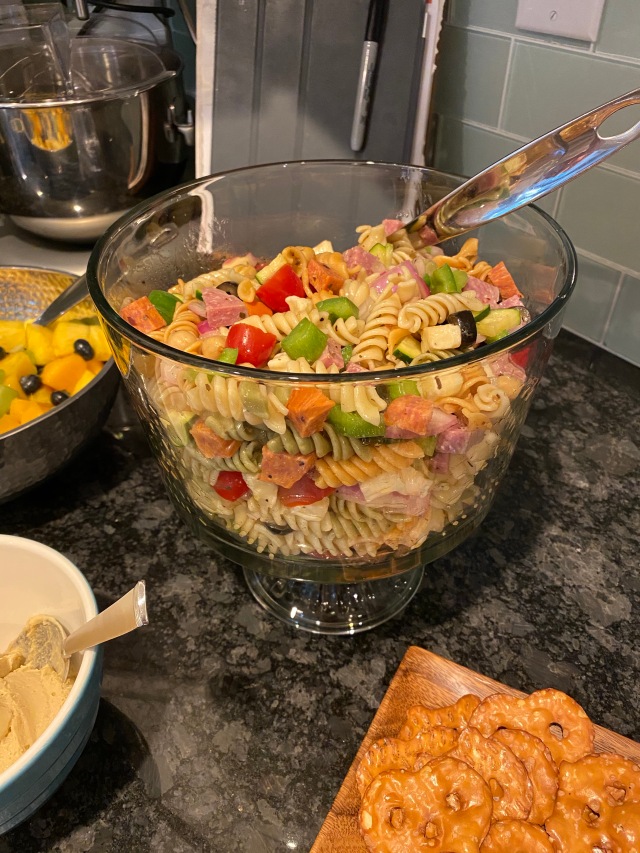
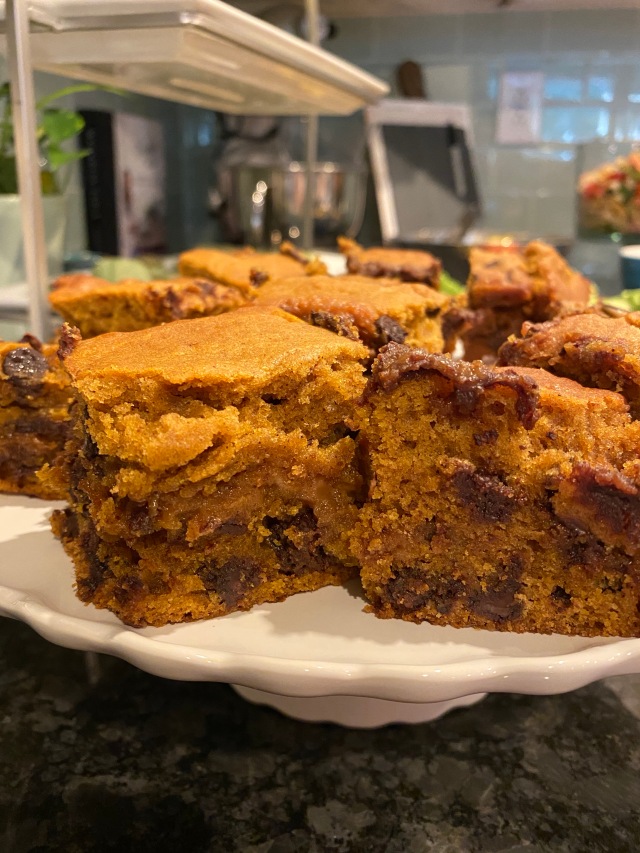
And you know it wouldn’t be a Pinterest Party without some yummy homemade food, so here’s what I prepared for my get-together.
The Menu

- Veggies (carrots and broccoli) with Hummus
- Fruit Salad – pineapple, mango, kiwi & blueberries
- Goat Cheese with honey, fig & pistacios, served with pretzel chips
- Italian Pasta Salad
- Spinach, goat cheese and sun-dried tomato pinwheels (I used spinach tortillas)
- Loaded Caramel Pumpkin Blondies
Have you ever done any mosaic projects? I’d love to hear about them! Comment below or connect with me on instagram @elleandjaydesign.