

Summer break has come to an end in our household and I’m finally back to share some of the projects I completed over the summer. I hosted a few Pinterest Parties this summer, the first of which consisted of creating DIY wooden plant stands. This super simple craft is easily customizable to your style and even further customizable using wood stains and paint.

So, what’s a Pinterest Party you ask? Only the most fun you’ll have on a Friday night 🙂 But besides that, its a ladies craft night (okay, sometimes Andrew makes an appearance when power tools are involved) that I host about every other month. I choose a craft or DIY activity, provide the materials, and my friends show up with wine in hand. Everyone customizes the craft to their style and needs, then takes home a one-of-a-kind treasure at the end of the night. Here are some of the adult crafts we’ve created in the past:
Usually I come up with an idea for these crafts while scrolling Pinterest, hence the party name, but this project came as a spinoff from another project. While building our herringbone barn door, we created a large pile of triangular shaped wood scraps (from the 1x6s we used). Since we had so many of them, I thought surely we could repurposed them somehow. As I played with configuring them in different shapes, the thought came to me that they could make a little plant stand. My idea was to put 4 triangles together to form a square, then 4 more perpendicular to those to form 4 ‘legs.’
After consulting my personal engineer-woodworker (Andrew), it was evident these materials weren’t exactly ideal for my grand idea. Structurally, I wasn’t going to get the aesthetic I wanted without visible screw holes and other construction techniques. But, the idea of a plant stand was now firmly rooted in my head and wasn’t going anywhere. Plus, who can’t use a new plant stand?!
So, I started to explore other materials to create the same look when I discovered these wooden circles at Lowe’s. Used for a plethora of craft projects, these inexpensive discs were just what I needed. But then I needed legs, or feet, to attach to the wood to make it into a stand. From the many furniture projects we have completed throughout the years, I’m no stranger to Lowe’s inventory. They stock a selection of furniture parts, including small feet and legs that could elevate the wooden circles perfectly.
So, one trip to Lowe’s and $350 later, I returned home with all the supplies needed for my Pinterest Party. Now, don’t stop reading! I was (over)buying supplies to ensure I had enough for the party and so that everyone would have their first pick of materials. I promptly returned the unused supplies at the end of the weekend. We ended up making 8 plant stands for about $200, so on average, the plant stands required $25 worth of material. Not bad for a fun little DIY to elevate your favorite plant babies.

DIY Wooden Plant Stand Materials
- Unfinished birch circle board
- Furniture legs (we used bun feet, classic table legs, more bun feet, and these bun feet. Plus a few more that are out of stock currently)
- Wood glue
- Drill
- Foam brush
- Wood Stain and/or paint
- Polyurethane
DIY Wooden Plant Stand Process
We started by playing around with the design of the plant stand and everyone chose a style and legs/feet for their project. On the bottom side of the wooden circle, we marked the center point of each leg.


I’m slightly embarrassed to admit that finding the center of the birch circle (so that we could evenly space the legs) was much harder than anticipated. With two math teachers and two engineers, we still couldn’t figure it out. When you don’t know where the center is located and have no other pertinent information to use (like the diameter or radius) its near impossible to find the exact center. So, we did our best, then eyeballed it and called it good.
Once the center of each leg was marked on the birch circle, we drilled a hole for each leg.


We chose to use our drill press for this task because it can be set to drill a specific depth. It is also great for drilling perpendicular to your drilling surface. This could easily be done with a hand held drill, but when you have the fancy tools, why not use them? amiright? Since all the furniture feet had the same sized preinstalled screw, the drill press made quick work of drilling all the holes needed. If you choose to use a hand held drill, make sure to drill only the depth of your screw – don’t drill all the way through the birch circle! You want to have a clean top, without any holes, for your final product.

Next, we added wood glue to the top of the leg and screwed the legs into place. And that’s the extent of building one of these plant stands!
Now, you can buy these metal plates for attaching furniture legs to wood. I found that we didn’t need them when making these plant stands. Definitely use them if you are making furniture, but for this project they are optional and honestly, just not needed. My one exception to this rule – angled legs. If you are making a plant stand and want to angle the legs, check out these metal plates for that exact purpose.
DIY Wooden Plant Stand Variations
As always, no two projects turned out alike and everyone customized their plant stand to suit their personal style. Some chose a pedestal look:


For the above plant stand, I actually combined two different furniture feet (this and this) to create the pedestal style.

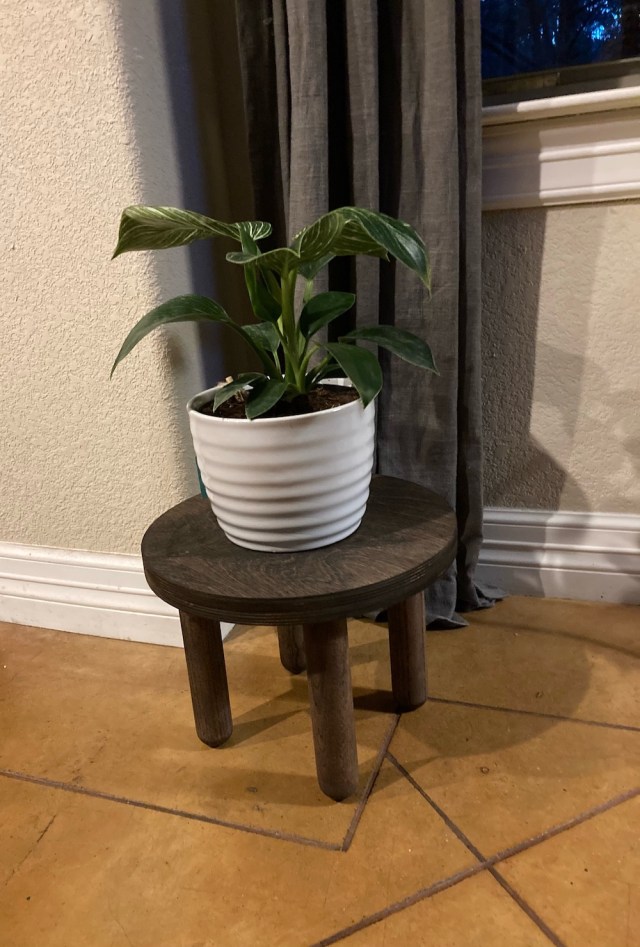
And others chose a classic style with four legs.

One of my guests wanted a thicker looking top for her plant stand, so she attached two birch circles together before attaching the legs. She did this with wood glue and a few brad nails. The possibilities are endless!


Paint and Stain
To finish the plant stands, most ladies stained the wood with Minwax wood stain (I provided an assortment to choose from), and a few used paint and stain for their project. We used foam brushes to apply the stain, then sealed them with Minwax polyurethane when the stain was dry.

And there you have it, simple, easy, DIY plant stands. This craft came together quickly and would make a great gift for friends and family members who love plants. You could even use these stands to coral other objects besides plants – one would look super cute on a desk to coral office supplies or in your kitchen to hold candles and soap.

Have you been crafting anything lately? I’d love to hear about it. Comment below or connect with me on instagram @elleandjaydesign. And you can find me on Pinterest here!


